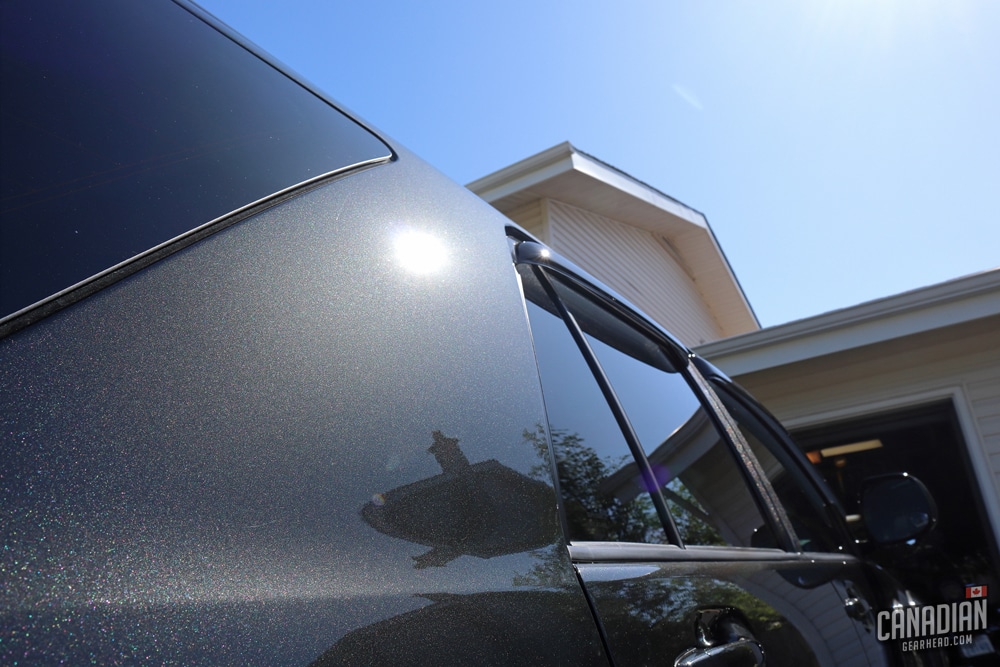
Paint correction is quite possibly the best way to make an average vehicle stand out from the crowd. It’s the Hollywood Hero of the detailing industry due to the drastic before/after shots that are shared online every day. What exactly is paint correction and how does it work?
What does paint correction mean?
The term “paint correction” refers to the process of removing defects (scratches, etching, oxidation, etc.) from your paint job through different stages of machine polishing. It is commonly done by auto detailers but many body shops will also offer these services as a way to avoid a costly repaint.
Some people may refer to this process as buffing, cutting and polishing, or even just simply: “polishing”. None of these are incorrect but the modern detailing world has moved toward the term “paint correction” as more of an industry standard.
How does paint correction work?
Removing scratches and defects requires the surface of the paint to be leveled. People are often confused by thinking that scratches can be “pulled” out of your paint magically. This is not the case at all.
In order to remove a scratch, the paint in the surrounding area needs to be removed until it’s level with the lowest point of the scratch. So in a way, you aren’t working on the scratch itself – you’re working on the area around it.
Imagine digging a hole at the beach. Rather than filling the hole in with sand, we’re removing the sand across the entire beach until it’s level with the bottom of the hole, making it disappear.
For some, this concept is terrifying. Yes, paint is being removed. But we’re doing so in very small, sometimes microscopic amounts. The average light scratch can be removed without taking more than a couple of microns of paint off. Deep scratches are a different story and will need to have the pros and cons weighed before deciding whether to remove them or not.
So how do we level the surface of the paint? Technically, it can be done by hand but 95% of the time machine polishers are much more effective. Detailers will use a range of equipment to get the job done:
Machine polisher – either rotary or dual action (random orbital)
Polishing pads – made from foam, microfiber, or wool in a range of different sizes
Compound or polish depending on the step being done
What paint correction WON’T fix:
Not every problem with your vehicle’s paint job can be fixed with a paint correction. It won’t fix dents or stone chips. It won’t change the color of your car’s body panels to fix paintwork that doesn’t match. Extremely deep scratches and gouges are outside the realm of what paint correction can do as well. All of those things are jobs for a body shop.
Steps and stages of paint correction
You may have heard people mention 1 step, 2 step and sometimes even 3+ step paint corrections. This represents the different stages of correction – compounding, polishing, and sometimes even wet sanding. The number of steps will vary depending on the specific paint job and its condition. Here’s how each of them work and when they’re typically used:
Wet Sanding
This is the most aggressive way to remove scratches and defects from your paint. Using sandpaper on your paint is not for inexperienced detailers. When in the wrong hands, wet sanding can cause excessive amounts of paint to be removed and in inconsistent patterns.
If done by a skilled expert though, they can remove very little paint by wet sanding just enough. This is very much an acquired skill that isn’t learned overnight. Many professionals will pay attention to more than just what they can see – they’ll go by what they feel and hear as well.
Wet sanding can be done either by hand with a sanding block or by machine. Water is used for 2 reasons. First, as lubrication to keep the sandpaper gliding smoothly across the surface. Second, to carry any paint that has been removed away in order to keep the grit of the sandpaper from getting clogged up (and eventually becoming ineffective).
When do you wet sand a vehicle?
Typically, wet sanding is reserved for heavily damaged paint jobs. There are some cases where consistent, light wet sanding is LESS aggressive than hitting the area hard with a polisher for a long time. It allows you to work an area for a shorter amount of time and creates very little to no heat in comparison to machine polishing.
Wet sanding is also used to level texture (orange peel) in a paint job. This is often done by body shops after spraying fresh paint but can also be done by experienced detailers. A softer block is often used when removing scratches but switching to a hard block will allow orange peel to be flattened.
Compounding (Cutting)
Compounding with a machine polisher is what the majority of people will use to remove scratches and defects from a paint job. A compound is a liquid that contains chemical and or physical abrasives in it. Almost like the grit from sandpaper rolling around loosely in a fluid.
If you put some on your finger, you can actually feel the grit. This combined with the friction of the machine is what scrubs the paint off.
Firm, heavy cut foam pads can be used for compounding but it’s becoming less common nowadays. Microfiber and wool pads have taken their place for the most part. They typically offer more aggressive cutting power and can be cleaned out with compressed air more efficiently in an effort to continue to work clean.
Compounding can be done with either a rotary or a dual action polisher. Much like wet sanding, using a rotary polisher is an acquired skill. One that is considered “old school” to some. When in the right hands, a rotary polisher can be very efficient, offering more aggressive cut in less time. But just like wet sanding, a rotary polisher can also cause damage when used incorrectly.
Thanks to modern technology in both pads and machines, dual-action polishers can be almost as effective as rotaries. The plus side is that they’re much less dangerous due to their random orbital polishing action. They can still cause damage, but it’s much less likely than with a rotary machine.
When do you compound a vehicle?
Compounding is done when the scratches are too stubborn for a lighter polish to remove, but wet sanding isn’t required. It will also be done after wet sanding to clear up the sanding marks left behind by that process.
Polishing (Refinement or finishing)
The polishing phase is very similar to compounding, just less aggressive. Both the pad and the liquid are milder since the focus is on refining the paint at this point.
Because the compounding stage has so much bite, it’ll often leave behind a haze afterward – sometimes even uniform “tick” marks when using a microfiber pad on soft paint. The job of the final polishing stage is to remove this and restore full clarity in the paint.
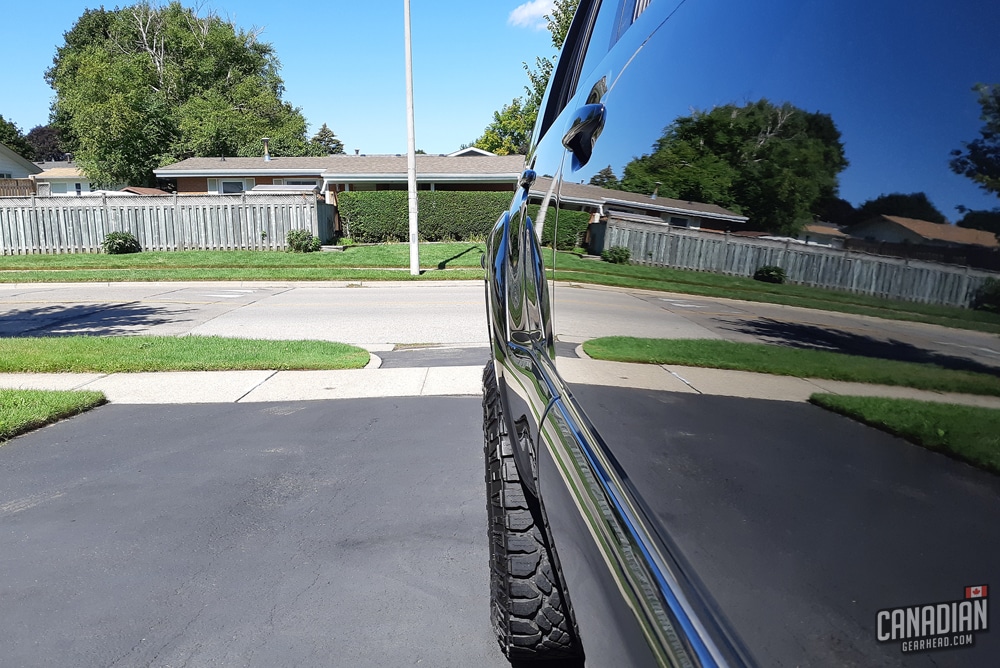
In general, polishing is what brings out the high levels of gloss and depth that you see after a paint correction. Softer foam pads are usually the choice here.
When do you polish a vehicle?
A finishing polish is intended to do just that – finish the job. It’ll restore the paint’s clarity that may have been lost from the compounding stage. Think of the compound as more of a necessary evil and the polish as the one that brings out the ultimate shine.
Although most polishes are meant to be mild, some of them still offer a decent amount of cut as well. With the right technique, these can be used for minor paint corrections all by themselves (without compounding first).
This is common on vehicles that only need light swirl marks fixed or on colors like white or silver that don’t show scratches as much. This is especially popular when prepping brand new vehicles for a ceramic coating.
Protection
Protecting the paint isn’t counted as a step in a paint correction because it’s just assumed. No matter how many stages of cutting or polishing you do, you’ll never leave the paint completely bare afterward. Some type of protection will be applied no matter what, whether it’s a wax, sealant, or ceramic coating.
How this is applied varies on the product itself, the vehicle, and the preference of the person doing the job. Waxes and sealants can be applied by hand or machine.
Doing it by hand on an average-sized car is easy and doesn’t take long at all. Some people prefer to use a machine to apply them on larger vehicles like trucks, boats, and RVs. Ceramic coatings are applied by hand and tend to take more time than a wax or sealant.
How do you determine how many steps of paint correction are required?
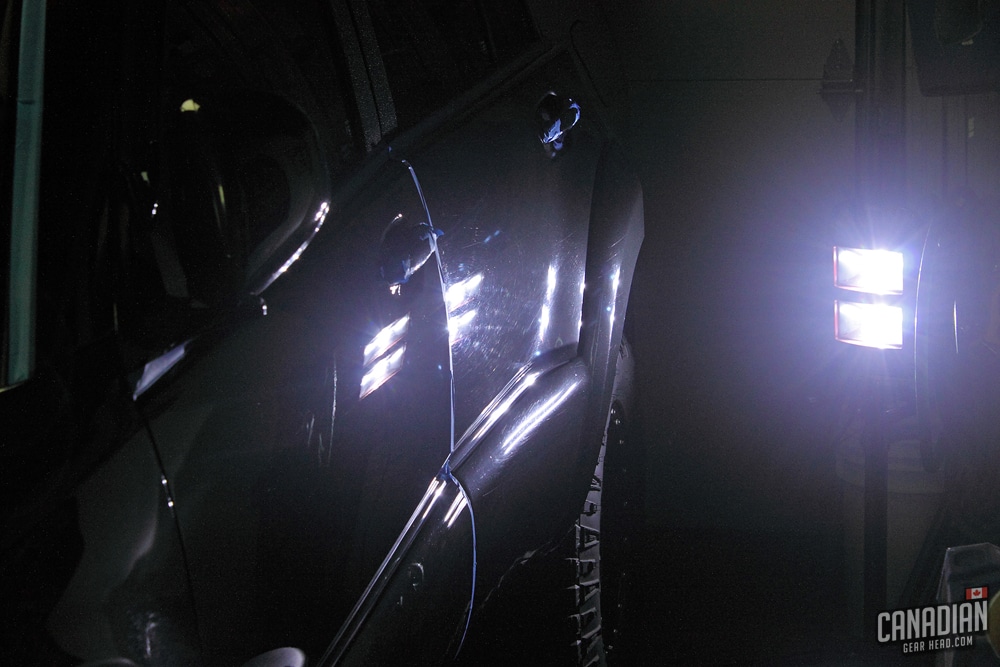
There are times when experienced detailers are able to take a quick look at a vehicle and guess how much work it’ll need. The only way to know 100% though is to begin polishing it and see how it responds. This is where the test spot comes in.
It really comes down to trial and error. Testing out different products and processes on a small section of the vehicle is the only way to know for sure what will work best. The idea is always to start with the least aggressive method, then step it up progressively until the desired results are achieved.
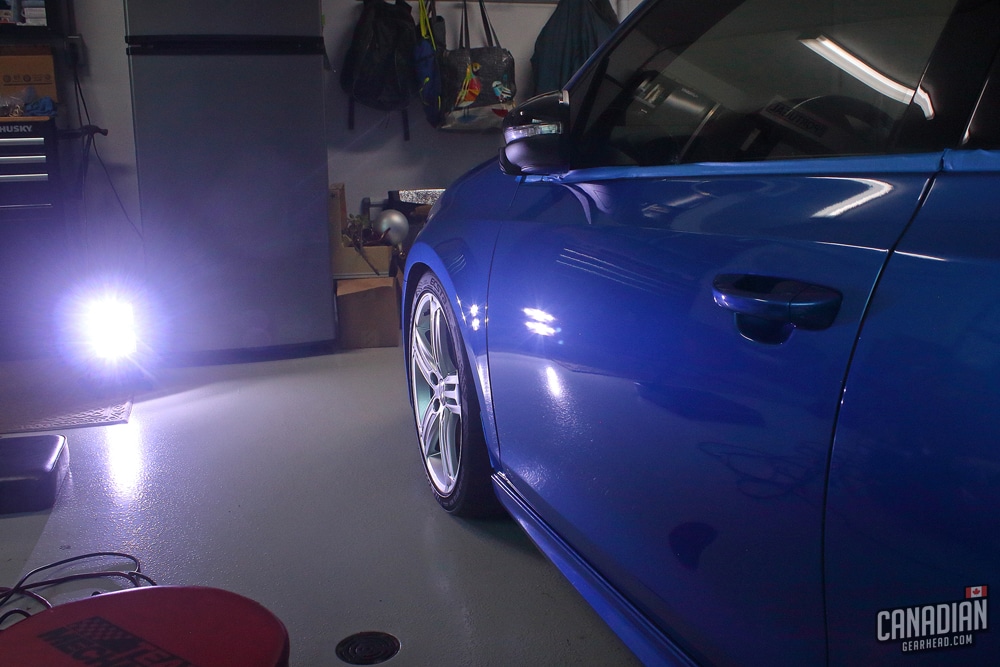
No two paint jobs are identical – they all react differently. Different colors will be more likely to show scratches and haze (black and other dark non-metallic colors).
There are also hard paint jobs and soft ones. Hard paint is more difficult to remove scratches from but harder to scratch in the first place. Soft paint is easier to scratch but also easier to fix. Getting the last 10% of refinement can be difficult with soft paint.
This is why testing is important. A light-colored vehicle with minor swirl marks and soft paint might only require a 1 step correction with a finishing polish. A heavily damaged black car might require wet sanding, compounding, and multiple steps of refinement to get the clarity perfect after. Basically, once you start working, the paint will tell you what it needs.
What is the difference between polish and wax?
Polish is abrasive and is meant to remove scratches from your paint. It leaves behind zero protection. Wax is non-abrasive and does not remove scratches. It’s intended to be spread on top of the surface to protect it from the elements.
These two terms are often confused. A lot of people from older generations used to refer to applying a wax as “polishing” their vehicle. As time passed, each of these terms now has its own specific meaning. Polish is used in the paint correction process to repair the paint. Wax is used for paint protection as well as added (but temporary) shine.
Is paint correction safe for your vehicle?
Honestly, it depends on the vehicle and the amount of damage that needs to be fixed. In general, paint correction is perfectly safe when done by an experienced detailer. There are a few variables that can drastically change whether the process is safe or not for your particular car:
Detailer skill
Putting a rotary polisher or sandpaper in the hands of the wrong person can absolutely make paint correction dangerous for your car. The likelihood of removing way too much paint is increased.
The edges and body lines of a vehicle tend to already have thinner paint than the rest of the panels and failing to take this into consideration can result in burning through the clear. Failure to manage the heat from a machine properly can also cause the paint to swell or melt.
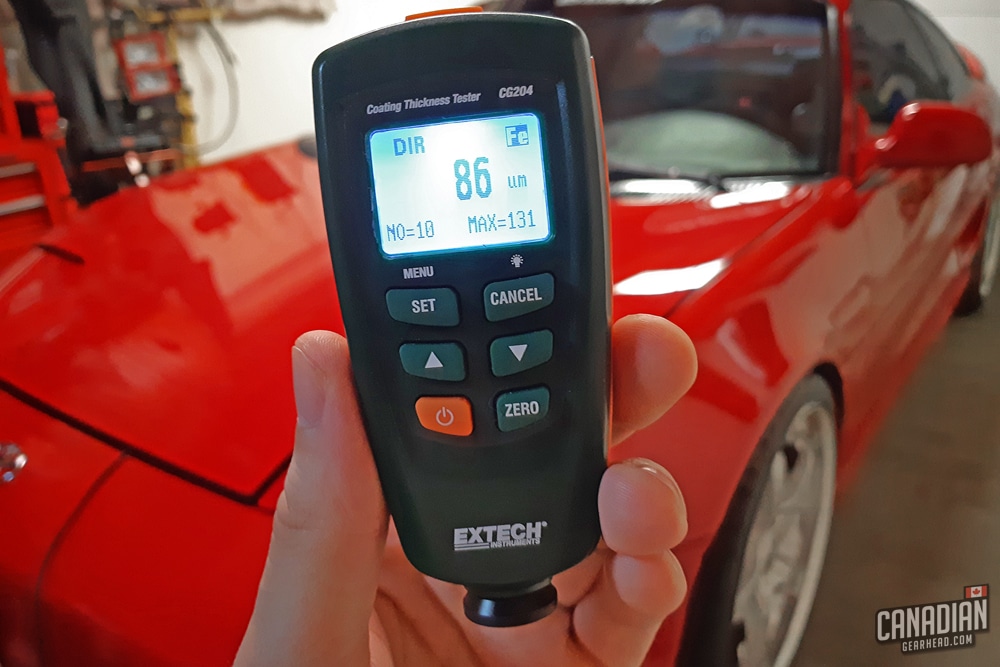
Paint thickness
A vehicle’s history plays a big role in how safe a paint correction is. Has it ever been repainted? How many paint corrections has it had before? There is a limit to how far you can push this. Treating a vehicle with thin paint the same as one that has plenty can lead to catastrophic clear coat failure.
Even if you’re able to polish the paint without breaking through the clear coat immediately after doesn’t necessarily mean that you didn’t go too far.
Most of the clear coat’s hardness and UV protection migrate toward the top of the surface. Removing too much and leaving very little behind can seal its fate in the near future. Just because it didn’t fail right away doesn’t mean that it won’t after a few months of sitting in the sun.
The job of your vehicle’s clear coat isn’t just to make it shiny. It’s meant to protect the painted surface from the elements. That’s why the goal should always be to maintain as much of the clear coat as possible. It’s also why you need to be able to trust your detailer’s skill and experience.
Level of damage
Sometimes your paint just can’t be saved. As much as we hate to admit defeat, that is a real-world decision that needs to be made. Is it worth it to risk ruining the entire clear coat just to remove one deep scratch? Of course not.
If a scratch has gone deep into the base coat or even too far into the clear, it likely isn’t safe to remove it. A good detailer will have ways to minimize it and make it less noticeable (rounding off the edges) without the risk of causing irreparable damage. Again, this is where experience comes in.
Remember, once your paint is gone – it’s gone. The only way to get it back is to repaint the vehicle. And if you think a professional paint correction is expensive, wait until you price out a complete paint job!
How long does a paint correction take?
Now that you know how the multi-step process is decided (testing), you’ll understand that there’s no simple answer for that. Different paint jobs require a different amount of work, especially when it comes to the level of damage that needs to be fixed.
It might take an afternoon or it might take a week. It all depends on how much attention it needs as well as how the detailer themself chooses to work. Most of the how-to information on the internet promotes a slow-paced, safe way of working with a polisher. There is nothing wrong with working like this, but it does take time.
In recent years, a select group of high-end detailers has shared what is commonly referred to as the “hammer down” approach to paint correction. This fast-paced way of polishing might appear to be much more aggressive and reckless but in reality, it can be not just efficient – but safer too.
Guys like @jasonkilmer, @proficient_x, @redsdetail_co, @shine_doctor, and @funkendetailer have brought these techniques into the public eye lately by offering training courses on these specific techniques.
These guys are in the upper echelon of detailers so my recommendation is that when they speak – you listen. Their combined knowledge is a huge asset to the detailing industry. The amount of work they can get done in a small amount of time is impressive, to say the least.
Can you do paint correction outside?
Paint correction is one of those things where you want to be able to control your environment in terms of cleanliness and temperature. However, that isn’t always possible in the real world. We don’t all have access to million dollar detailing facilities.
Polishing paint outdoors isn’t something to be taken lightly though. You’re still putting a powerful, spinning machine on your paint – and any contamination that gets caught up between the two can cause more damage than you’re fixing. So working right next to a construction site on a windy day isn’t exactly a great idea.
Temperature is important as well. Working in direct sunlight in the summertime can create a painted surface that is way too hot to safely work on. The friction of the polisher will heat up the surface so if your paint is already too hot to hold your hand on just from the sun alone, machine polishing is a no-go.
Mobile detailers will perform paint corrections outdoors on a pretty regular basis. Sometimes they’ll use a tent or awning as a source of shade. They’ve also learned what compounds and polishes offer more room for error when working in these kinds of conditions.
Is it ideal? Absolutely not. If you have the choice, working indoors is almost always the better option. But sometimes when a job needs to get done, minimizing your risk while working outside is the only solution. You can see me perform a cycled 1 step paint correction outdoors in the video below:
Hopefully, this has answered any questions you might have had regarding paint correction, what it is and how it’s done. Make sure to check out my other detailing posts like this one that talks about everything you need to know when hiring a professional detailer.

Tim is the creator of Canadian Gearhead. His experience with auto detailing and working for Toyota shows through all of the articles posted here. He runs the Canadian Gearhead site and YouTube channel full-time now and currently owns a 2007 4runner, 2006 Tacoma, and 1991 MR2. Read more about Tim:
Leave a Reply