Let’s face it, wheel bearings are one of those things that nobody wants to deal with. Not only is it annoying, but it’s a very serious problem to have. On top of that, it can be expensive to fix because it requires very specific tools.
That’s right, I’m talking about the dreaded press. Well my friend, worry no more. In this article, I’m going to fill you in on a secret to fixing that annoying bearing without the need for special tools of any kind. Yes, even without needing a press.
So, what’s this big secret to fixing a blown-out bearing? Just replace the entire hub assembly. I know you’re thinking, how is replacing the entire thing not more difficult than just replacing the specific part? Well believe it or not, it’s as simple as four little bolts.
By far the quickest, easiest, and most cost-effective way to remedy a worn-out wheel bearing is to replace the entire hub assembly. Using the proper tools, this is a job that you and a friend (or even just you) can knock out in an hour or two and have you back on the road in no time.
Before we start taking the truck apart though, let’s get into some prerequisites to make sure this is even what we need to be doing in the first place.
How to diagnose a blown-out front bearing
Think you have a bad front wheel bearing? Here are a few questions to ask yourself when trying to diagnose a bad bearing: Is there a grinding noise coming from the front end while I’m driving? Does my vehicle want to pull to one side while I’m going down the road? Am I getting some play in the wheel while driving?
If your answer is “yes” to any of these questions then the culprit may indeed be your front bearing.
One final test you can do is to remove your tire and spin the wheel hub. If you hear a grinding sound when spinning the hub, it’s time for a replacement.
What happens if I just leave it be and continue driving?
Look, I understand wanting to just leave well enough alone especially if you’re strapped for cash at the moment. Be that as it may, take it from me that this is the last thing you want to leave unattended. I, unfortunately, have firsthand experience with this.
When I was 18 years old I was driving back to Alabama from Mississippi, thinking absolutely nothing of the grinding noise coming from the front end of my 4Runner as I cruised down the highway at 75 mph. Next thing I know I hear a loud crunch and my vehicle jerks hard to the passenger side and I quite literally grind to a halt.
Unbeknownst to me at the time that grinding noise I ignored was a worn wheel bearing and had there been anyone near me on the road, it would have been a much worse accident than the bearing failing and sending me into the emergency lane.
Relatively speaking, I actually got off easy. Driving on a blown-out wheel bearing can make it difficult to keep your wheel straight, cause your wheel to seize up while driving (what happened to me), or even make your wheel come completely off while you’re on the road.
Any one of these instances can cause a serious wreck that could injure or kill you and anyone else you take out along the way. It’s a serious problem that needs to be taken care of immediately.
Fixing the problem; DIY vs. taking it to the shop
Now that we know what’s going on, it’s time to get that bearing fixed! This is where we deviate from replacing just the wheel bearing and opt into replacing the entire hub assembly. We’re doing this to avoid the hassle of going to the shop and also to avoid the headache of trying to find a press if you don’t already have one.
In the U.S. the average cost of replacing a bearing is $350 per side, and for the hub assembly, it averages out to roughly $450-$550 per side. By taking this problem to a shop you could very easily be paying upwards of $700 to have both sides done.
If we buy our own parts and replace the entire hub assembly though, we’re looking at prices closer to $300-$400. For example, I bought a Carquest Pre-Pressed Hub Assembly from Advance Auto Parts and it only cost me $160. By buying your own parts and doing your own repair, you’re going to be keeping more money in your pocket to use on later repairs or more mods for your 4Runner.
You can find the same hub assembly I used here:
Don’t worry 4WD guys, I’ve got you covered too. The part you need is right here!
Replacing a 4th gen 4runner hub assembly – Step by step:
Alright, let’s get to it! Here is a list of the tools you will need to get this job done:
- Ratchet
- 17mm socket
- 17mm wrench
- 12mm socket
- 36mm socket (4WD only)
- Small bungee cord
- Groovelock pliers
- Chisel (4WD only)
- Pry bar (4WD only)
- Rubber mallet
- Torque wrench
- Brake cleaner
- Shop towels/microfiber rag/bristle brush
Step 1. Remove the tire
Seems obvious, I know, but every job starts somewhere.
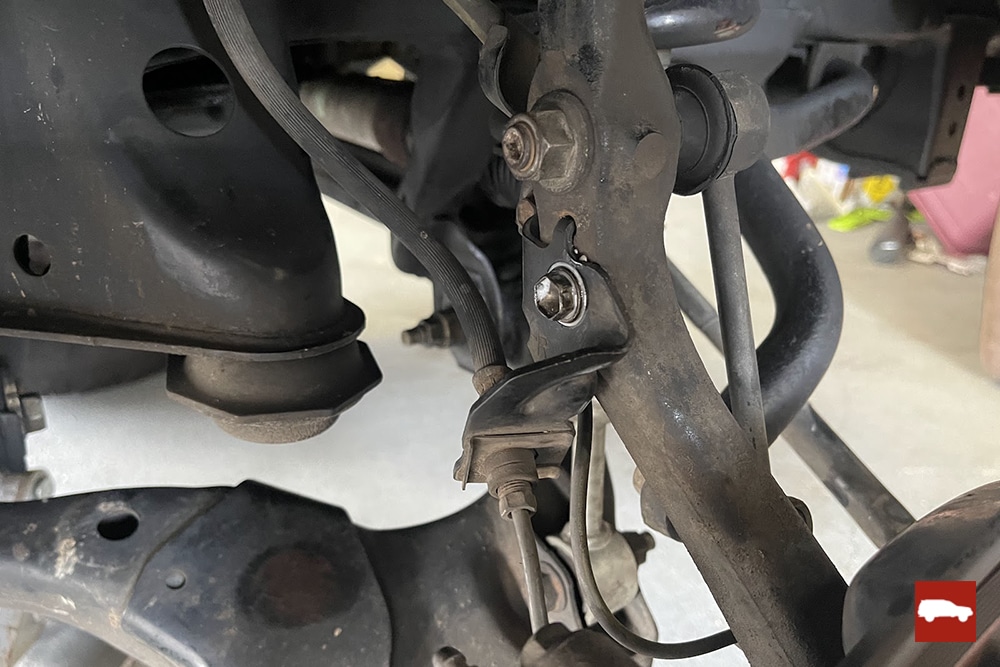
Step 2. Remove the brake line bracket
To do this, you’ll need your 12mm socket. Once you remove the bolt holding it in place, move the bracket and line back a bit so it’s not in your way as you move on down the list.
Step 3. Remove and hang the caliper
In order to remove your caliper, you’ll need to remove the two bolts in the back. Both should be 17mm so grab your ratchet and get going. Once the bolts are out, give the caliper a slight tug and see if it’s ready to come off.
If you face any resistance, grab your groovelocks and squeeze the pads away from the rotor. When you do this, be careful to place the jaws on the metal backing on the top of the pad and the inside edge of the caliper. By doing this you won’t damage your pad as you grip it. Make sure to keep one hand on the caliper if possible so it doesn’t slide off once it’s loose!
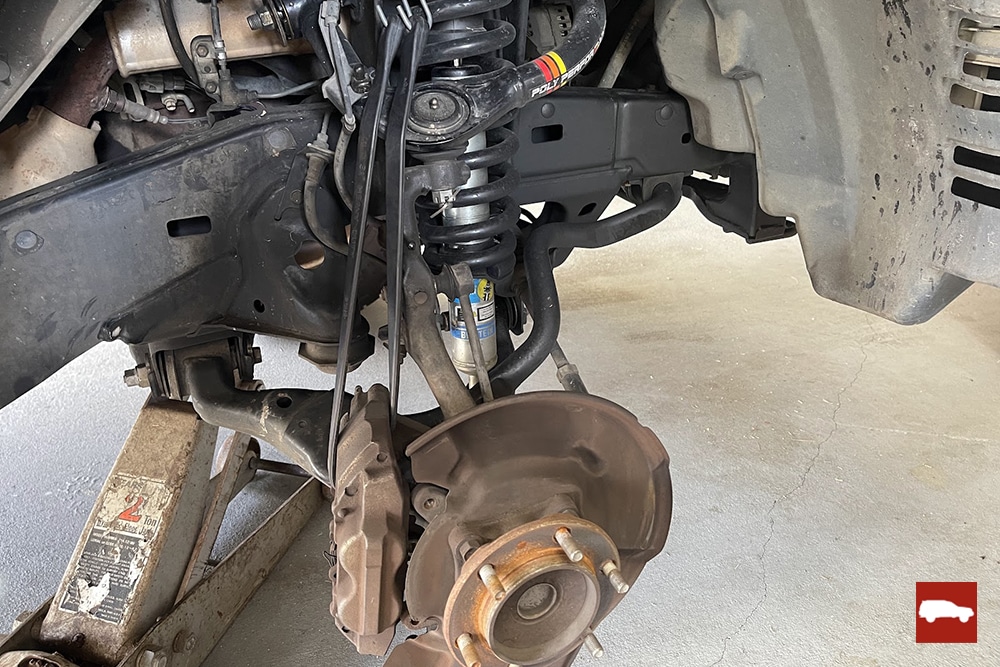
Now that it’s free, go ahead and grab your bungee cord and loop it through. I chose to hang mine from the top of the coil, as shown below. From this position, it should be totally out of the way and not pulling too hard on any brake lines either.
Step 4. Remove the rotor
You should be able to pull off the rotor now. Be sure to only grab it in the center and not the smooth surface where it contacts the pads. This will keep any stray grit and debris from getting on the rotor. Set it down in a clean, dry spot, spray it with some brake cleaner, and you’ll be ready to move on to the next step.
Step 5. Remove the center hub cover (4WD ONLY)
This and the next step apply only to 4Runners equipped with 4WD, so 2WD guys like myself can skip to Step 7.
Now you should be looking at a round cover over the center of the hub. To remove this, use your groovelocks again to pull it away from the hub. If it’s particularly stubborn you can grab your chisel and, coming from behind it, gently tap a dent into the cover and use the chisel to push it away from the hub.
Be careful not to punch a hole through, but the dent should have no effect on the integrity of the cap when you reinstall it.
If you need a visual for your 4WD, 1A Auto has a fantastic video with everything you’ll need to deal with that CV axle:
Step 6. Remove the cotter pin, locking cap, and axle nut (4WD ONLY)
You should now be looking at the end of the CV axle coming through the hub. On the end, you will see a nut capped with a locking piece and held in place with a cotter pin. Remove the cotter pin and locking cap, followed by removing the nut with your 36mm socket. You may have to use a pry bar or your hands to keep the hub still while you unscrew the nut.
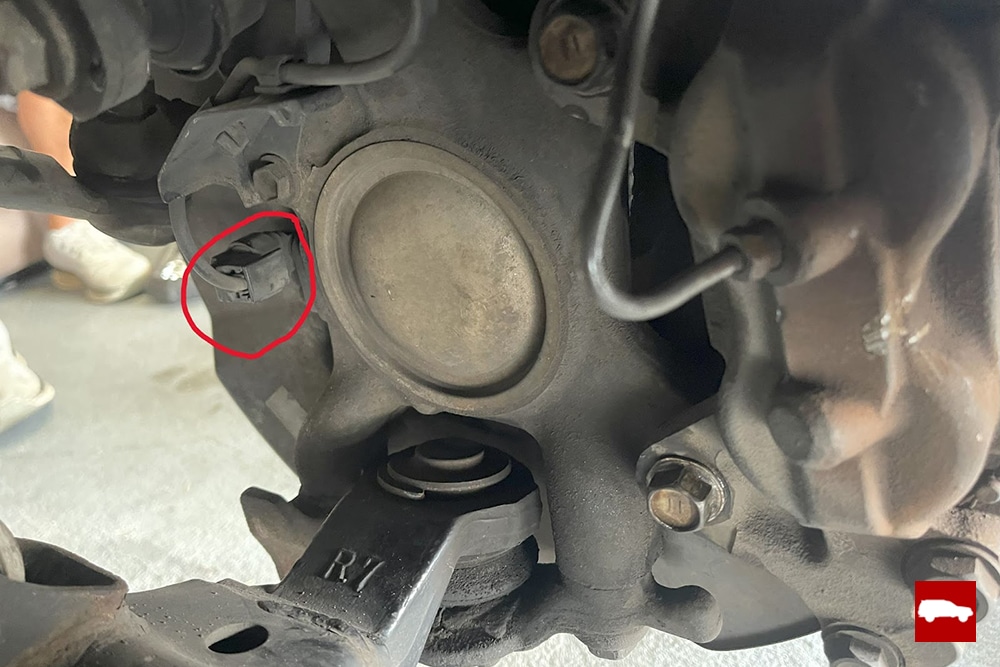
Step 7. Unclip ABS sensor
This one is easy, just unclip the sensor from the socket and pull it through. Nothing to it.
Step 8. Push the CV axle back through the hub (4WD ONLY)
This is another 4WD-only section, so you can go on to Step 9 if this is info you don’t need.
Once the nut is off and the ABS sensor is pulled, it’s time to push the CV axle back through the hub. This is another time to be careful because you don’t want to damage any of the grooves on the CV axle. If you’re having difficulty with getting it through, put the end of the chisel directly into the center of the CV axle end and tap it out.
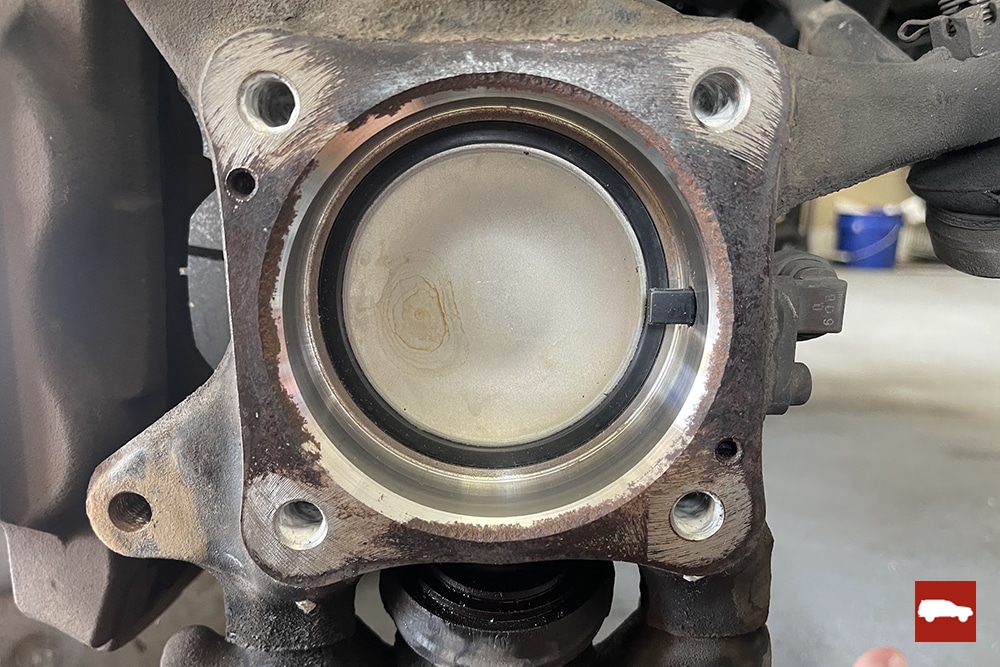
Step 9. Remove the entire hub assembly and dust cover
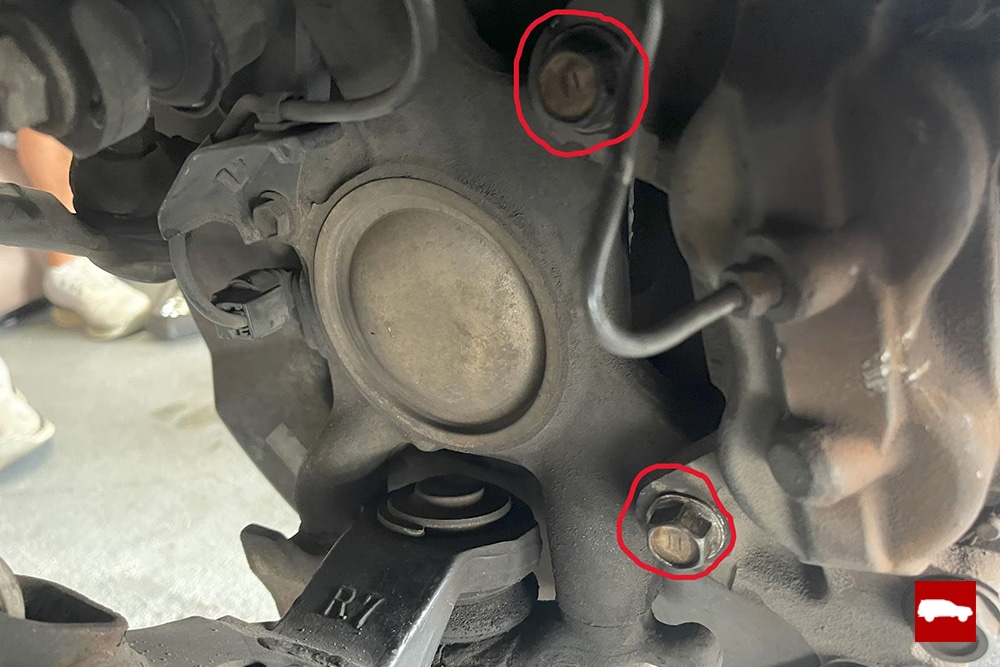
Now we’ve arrived at the actual fix for all of your bearing problems. This is also where that “it’s as simple as four bolts” line from earlier comes in. First, go ahead and mark the dust plate top and bottom. You can do this however you want, just as long as you can tell what the top and bottom sides are. I simply marked a “T” and “B” in the dust that was already on there.

In between the studs and the dust plate, you will see four 17mm bolts, in the picture above you can see two of them. Use your wrench to loosen the bolts. Don’t worry when they don’t come all the way out, they aren’t supposed to.
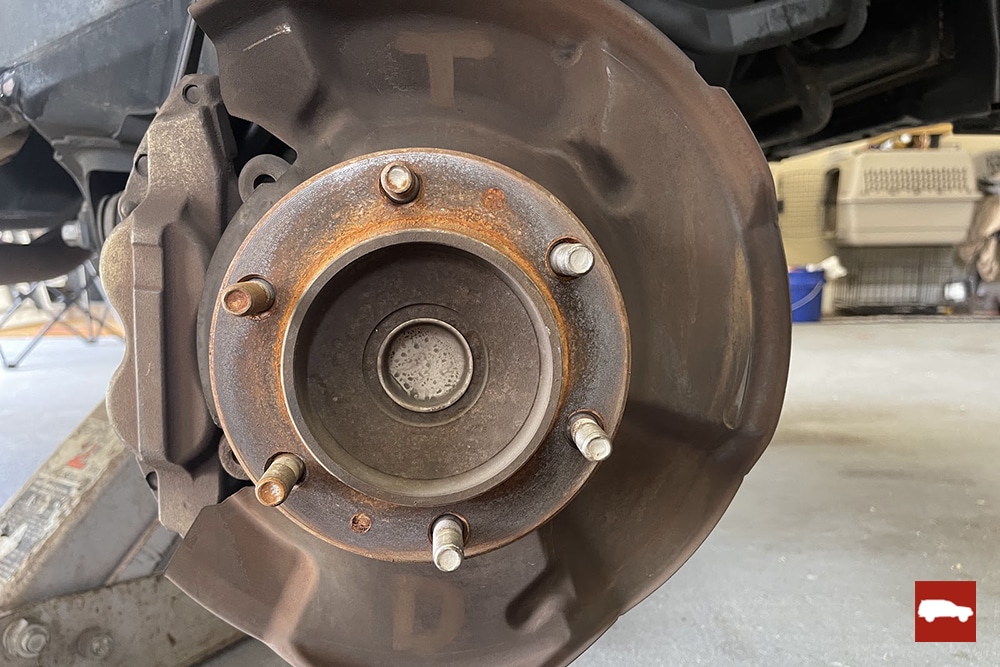
Once the bolts are free, you can pull the hub assembly out. It may be a little tough, but with a little elbow grease and a few taps with a rubber mallet, you should get it out with little trouble. Keep a hand on your dust plate too if you can, it will follow the hub as you pull it out. Easy as pie! Now, you should see this:
Step 10. Take some time to clean
Now that you have everything taken apart, take a few minutes to really clean everything and get it as shiny as you can. I highly recommend using brake cleaner here, and any brand will do.
By using brake cleaner you won’t have to worry about any residual liquid hanging out in the assembly housing and by using something to wipe/brush it down afterward, your new parts will have a nice clean mating surface to seat into.
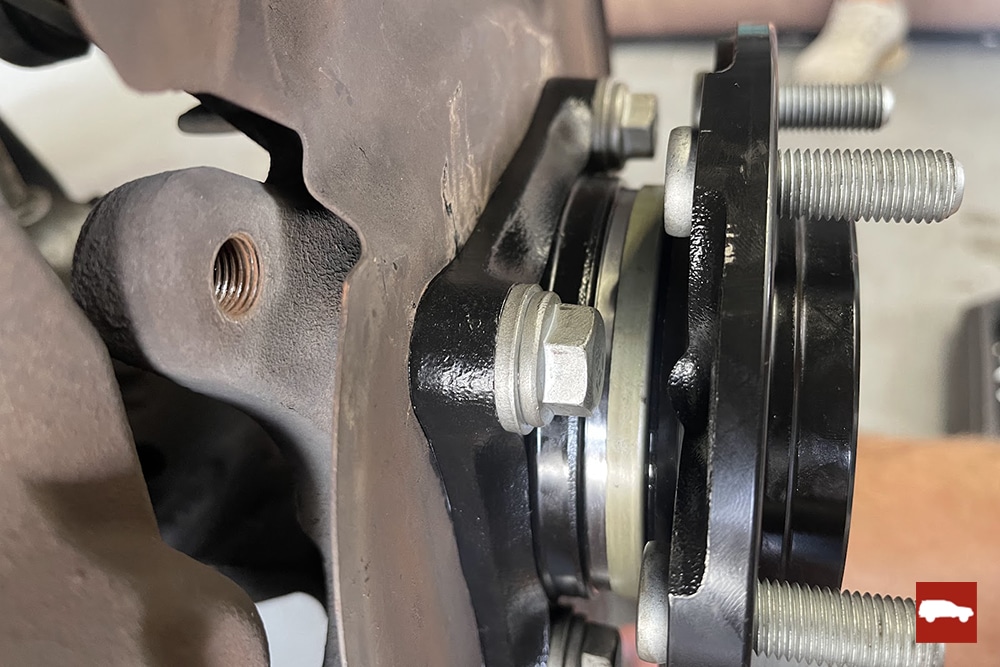
Step 11. Install your new hub assembly and dust plate
Now that everything is clean, you are ready to install your new hub assembly! To do this, line up the dust plate, in the correct orientation!, with the four holes on the knuckle and then line up the four bolts on the back of the assembly. This can be a little tricky to keep all of these lined up at once, so be patient and take your time.
Once you have them in line, get one bolt started to hold it in place and begin to push your assembly into the housing, tightening down all four bolts as you go. Don’t worry if you can’t push it all the way in right off the bat; as you tighten your bolts they will help pull it into the housing.
When you’re ready to tighten it down for good, grab your torque wrench and torque each bolt to 100 ft-lbs. Now, you’re probably not getting a proper torque wrench in there, so if you can’t then just focus on getting those 4 bolts as tight as you can (or to “good enough” if you’re like my Dad).

Step 12. Admire your work, and get to reassembling
Step back and be proud, you did it! Spin that hub and listen to the sweet, smooth sound of *nothing*. All that’s left now is to reassemble everything you took apart. Easier said than done, but just go in the reverse order of the previous steps.
Once you are ready to put the rotor and caliper back on, you may notice it doesn’t want to sit where you need it to. To keep it flush, simply screw two lug nuts on to keep the rotor in place and slide your caliper on.

Next, remove the lugs, tighten down the caliper bolts, and put your tire back on. You’re ready to roll! After getting everything reassembled, make sure to do a test ride to make sure everything feels and sounds right. You should no longer hear a grinding noise or feel any pull in the steering when you drive.
Other frequently asked questions
Now that the job is done, you might have a few common follow-up questions.
Should you replace both hubs at the same time?
The quick answer is yes. It’s not absolutely necessary and you don’t have to do them both on the same day either, but if you can it would be a good idea to do them both in at least a similar timeframe.
As the saying goes, “If one went bad, the other isn’t far behind”. When I replaced mine recently, I opted to do the driver side and then the passenger side two weeks later.
How long should a wheel bearing last?
You may also be wondering how long your new hub assembly and wheel bearing may last. In my experience, you should expect them to last around 80,000-100,000 miles or 6-8 years if you’re going off the US national average of driving about 13,500 miles per year.
Do you need an alignment after replacing hub assemblies?
Lastly, if you’re worried you may need to go get an alignment after installing your new parts, rest assured you will not need to take it to the shop when you’ve finished. Unless you need to tinker with any suspension components when pulling the hub away from the CV axle, then you should be totally fine to keep on trucking without a front end alignment.
Final words
Well, you did it! Now that it’s over and done with, be proud of your work and enjoy your now-smooth ride. I know it may have seemed like a lot, but when compared to the hassle of pressing new bearings I have always found that replacing the entire assembly is much easier. Plus, if you happened to be missing a stud for whatever reason now you’ve got it back as well!
In all seriousness though, I hope this article not only helped you out but also saved you time, money, and a headache. By using this method and doing it yourself you know the quality of work was top-notch, and if it’s one of your first projects then you’ll know your vehicle a little better for the future as well. I know that in my experience that was certainly the case and I wish you the same as well.

Drew is an avid DIYer when it comes to maintaining, repairing, and modifying his vehicles. He currently owns an 03 4Runner Limited with the 4.7 V8. It’s a 2WD model but that doesn’t stop him from taking it off-roading any chance that he gets. Read more about Drew:


Leave a Reply