Knowing whether to tape off any plastic or rubber trim on your car before polishing it can be confusing. You may have seen some people avoid it entirely while others use multiple rolls of tape in an effort to cover everything but the paint itself.
Taping off your trim comes down to personal preference and depends greatly on your polishing technique. In short, anything that you can’t avoid hitting with your buffer should be taped off. If you can avoid touching it, there’s no need to cover it in masking tape.
Why do people tape off trim before detailing a car?
There are a few reasons for masking parts of a car with tape before polishing it. Again, this varies greatly on the technique and experience of the detailer.
To minimize contamination
This is the most important reason for taping something off. If you’re polishing your paint, you want to only be touching the paint. Most automotive trim is made out of plastic or rubber. When it comes to paint correction, contamination is the enemy. The goal is to work as clean as possible at all times.
This means blowing out any spent polish or clear coat from your pad often. The perfect scenario is to have nothing but fresh product on a clean pad as often as you can.
Hitting plastic or rubber trim with a polishing pad will most definitely pick up foreign contamination. If you don’t believe me, take a look at your pad after hitting a section of trim. It will more than likely show black staining almost immediately.
That’s material pulled off the rubber or plastic and you’ll be grinding that into your paint if you continue on. This is a big mistake and can cause dismal results or even damage to the paint.
By taping off the trim, you remove the potential for rubber or plastic contamination from the equation. That doesn’t mean you can bump into the tape all you want – it should still be avoided. The tape just gives you a bit more room for error if you slip up.
To reduce the risk of damaging the trim
Damaging the trim itself is another concern when you hit it with your polishing pad. While rubber and plastic trim tends to be fairly robust for the most part, it’s still possible to burn it, scuff it, or discolor it. In the event that no damage is done, you’ll still face the lovely task of removing polish residue from a dark, porous surface. That’s not exactly fun.
To protect areas of thin paint
There are times where you’re forced to work on a section that has or is near thin paint. A prime example would be removing a scratch near a body line or edge. If your polishing pad hits this area while you’re focusing on removing a scratch, you can very easily burn through the paint. Adding a strip of tape strategically can make the area much safer to work on.
To manage product splatter
Product splatter is really only an issue when using a rotary polisher. If you’re having a problem with this when using a DA polisher, there is something wrong with your technique. Either you’re using far too much polish or you’re having trouble keeping your pad flat on the surface at all times.
Covering the gaps with tape will keep polish from getting splattered, but it’s also covering up your bad technique.
What parts of your car should you tape off before polishing?
How much you choose to tape off is really up to you. Aside from wasting time and tape, there are really no downsides to going overboard with it. If you prefer to mask everything on the car that isn’t painted just for peace of mind, feel free.
Personally, I’ve found that I tape less off as time goes on and my ability to control my polishers improves. Time is money and spending an hour working on an art project before polishing a car is wasteful to me.
Things to consider taping off:
- Any plastic or rubber trim that is directly connected to the paint being polished
- Body lines or areas of thin paint that can’t be avoided
- Sharp objects that can potentially damage your polishing pad
- Edges of decals or paint protection film that may be lifted by the polishing pad
- Hard to clean areas that might end up with polish splatter
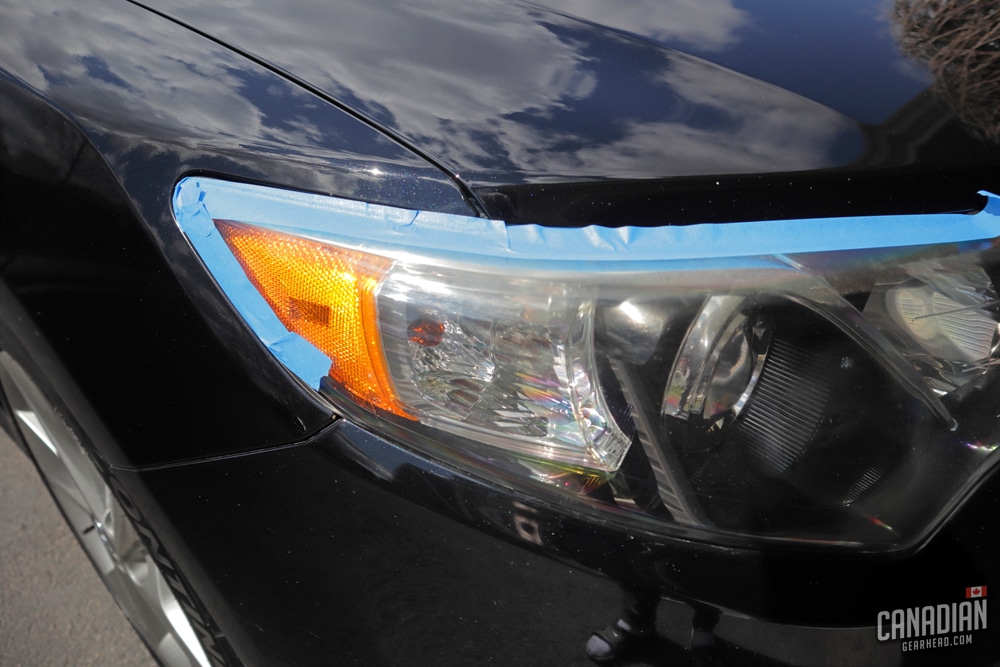
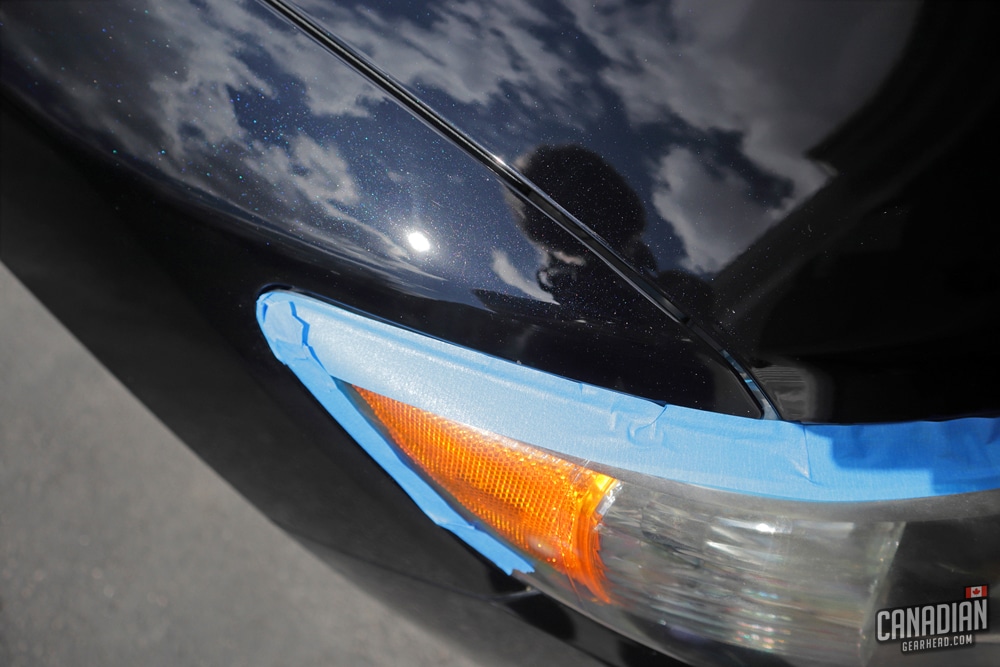
- Headlights (only the edges, no need to tape the entire light)
Things that don’t need to be taped off or masked:
- Window glass
- Wheels and tires
- Exhaust tips
- Adjacent painted panels that can be opened (explained below)
- Painted or chrome emblems
- Any area that can be avoided with your polishing pad completely
- Taillights (most don’t have a coating to protect against UV and can be polished just like paint)
What is the best tape to use on a car?
There are auto detailing specific tapes available on the market now that make the job much easier. These will stretch and conform better than traditional painters tape and will produce less dust in the event that you accidentally hit them with your pad.
You’re going to pay for it though. Tape from companies like Kamakaze is not cheap and will have you carefully deciding where you need to use it to avoid waste.
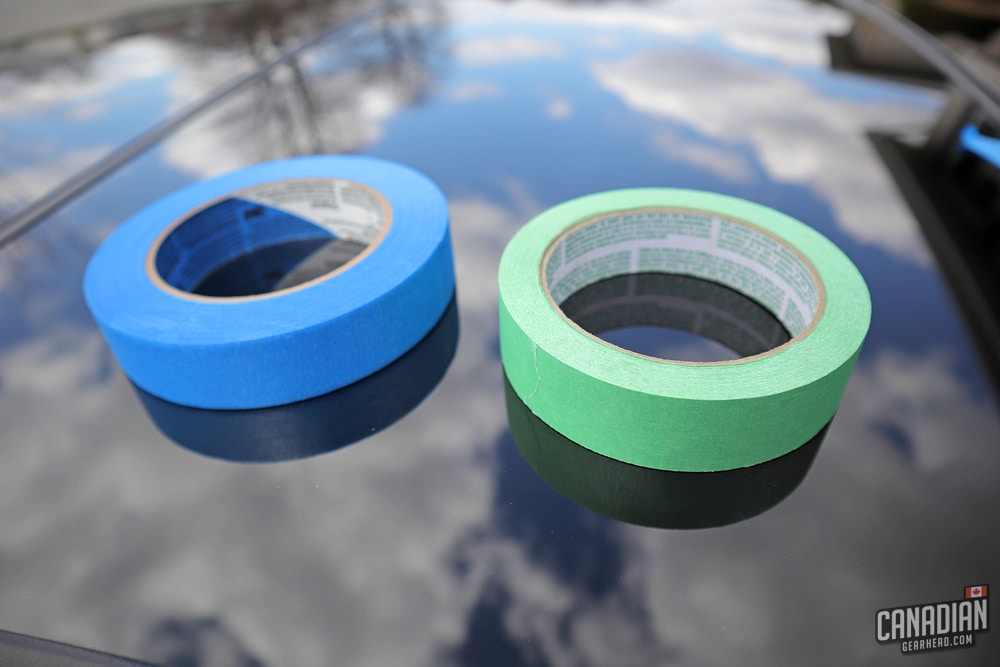
I stick with the 3M painters tape that you can find from nearly any auto parts or home improvement store. There are two different colors available – green and blue. Although they’re both very similar, there is a slight difference between them. The green tape is meant for automotive use and the blue tape is for general use. Great, green should be the best, right?
Not so fast. The green tape is meant for autobody use ie: painting. It is slightly stickier to prevent bleeding when painting edges. That might be needed for autobody purposes but it isn’t necessary for detailing. We actually want the least stickiness possible.
Will painters tape damage car paint?
In general, painters tape is safe to use on your car. It’s possible for it to cause damage though. Using the least sticky version helps to minimize the risk of lifting the paint underneath.
If you’re concerned with the surface being fragile, you can even stick the piece of tape to your pant leg first to make it less sticky, then apply it to the car. Always be careful when peeling the tape off your car and pull back against itself rather than up and away.
It’s also a good idea to remove the tape as soon as you can. I like to tape off the area I’m working on directly, then remove it as soon as I’m done. Leaving painters tape on your car for too long can potentially leave extra residue behind. It’s best not to leave it on overnight.
Although it’s better than leaving any plastic or rubber trim bare, you still don’t want to hit painters tape with your polishing pad unless you have no choice. For one, this will contaminate your pad and can change the way the paint reacts to your compound or polish. The other problem is that this can also cause a height difference in the polished paint and the paint under the tape.
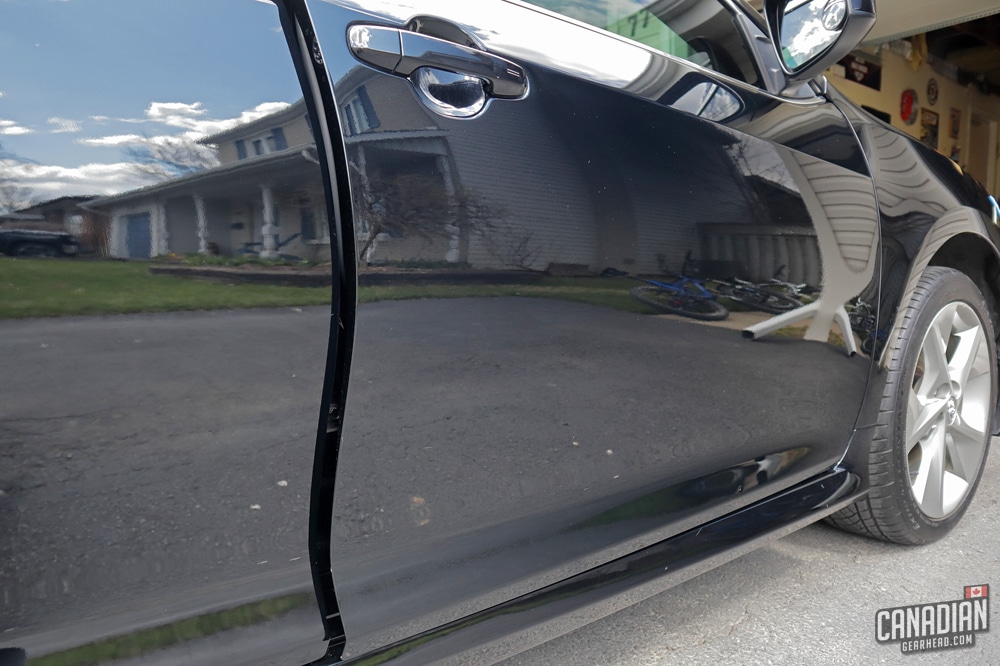
Yes, that means those 50/50 shots that so many detailers love to share are a bad idea. While they’re a great way to show the difference between before and after, they can potentially cause damage to the paint. The safer way to do a 50/50 shot is to use two adjacent panels like a front and rear door. The shot will look similar but no tape is needed.
How to polish areas without taping them off
Your technique and control over your polisher really come into play when it comes to taping areas of your car off. Once you get used to the dual action movement of your polisher, you’ll be able to get up close to things without touching them.
It’s important to use the right tool for the job. It’s unrealistic to think you can polish an entire vehicle with just a 5″ or 6″ pad. Taping areas off so you can mow them down with too big of a pad is not the right solution. You need to swap to a smaller pad (and sometimes even a smaller polisher) in order to reach certain areas properly.
If you can’t reach an area without hitting an emblem, the solution is not to tape off the emblem. Doing so might protect it, but you’re still going to do an awful job of polishing the paint beside it. The proper fix is to switch to a smaller polishing pad that will give you the control to work precisely where you need to.
Another scenario where you can avoid using tape is when working next to an adjoining panel. If you’re polishing the top of a fender, you might think you need to tape off the edge of the hood in order to protect it from your pad hitting it by accident. Remember, hitting the tape will still contaminate your pad.
It’s better to open the hood itself (even just slightly) to remove that edge completely. Now you can polish all the way to the edge of the fender properly without hitting anything you don’t want to. The same goes for any other panel that you’re able to open up in order to move it out of the way.
Speaking of moving things out of the way, you can approach some lights and accessories the same way. Rather than tape them off, simply get them out of the way. This will work for things like side marker lights and windshield washer nozzles.
If you tape them off, you still need to work around them and you likely won’t get the paint polished properly right up to the edge. By removing them, you have complete access to polish the surrounding area properly.
Other tips for taping off your car
You can reuse your painters tape
I know it’s not exactly going to break the bank but for some people, every little bit counts. Just because you taped off a piece of trim doesn’t mean you can’t reuse that same piece on the next panel you work on.
I like to peel larger pieces off when I’m done with them and stick them on a nearby window. That way I’ll grab that piece quickly when I mask the next section. Some professional detailers will do this because the wasted tape does add up after working on many vehicles.
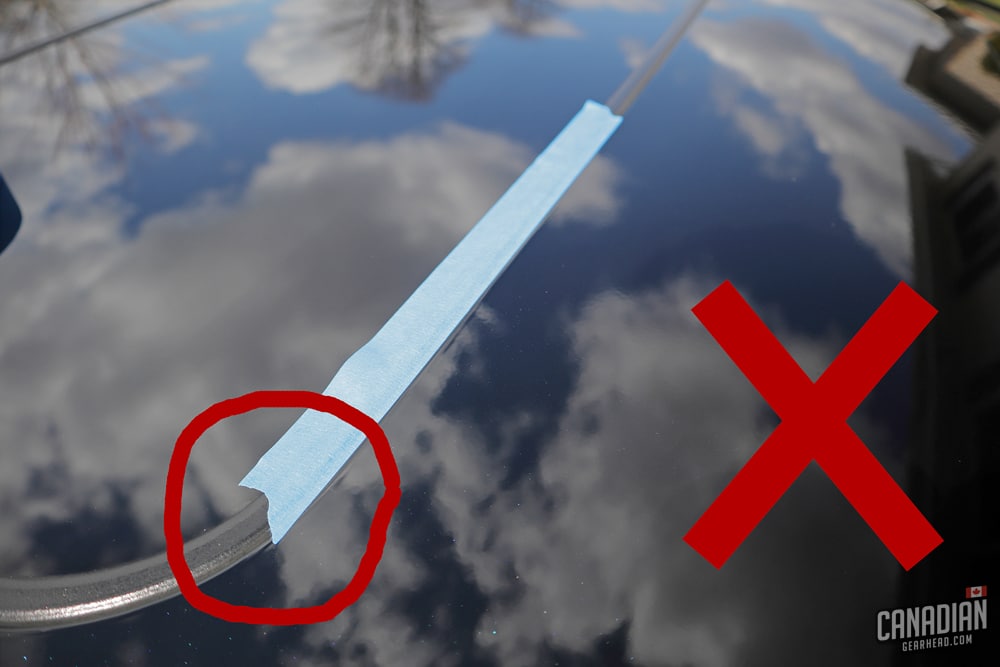
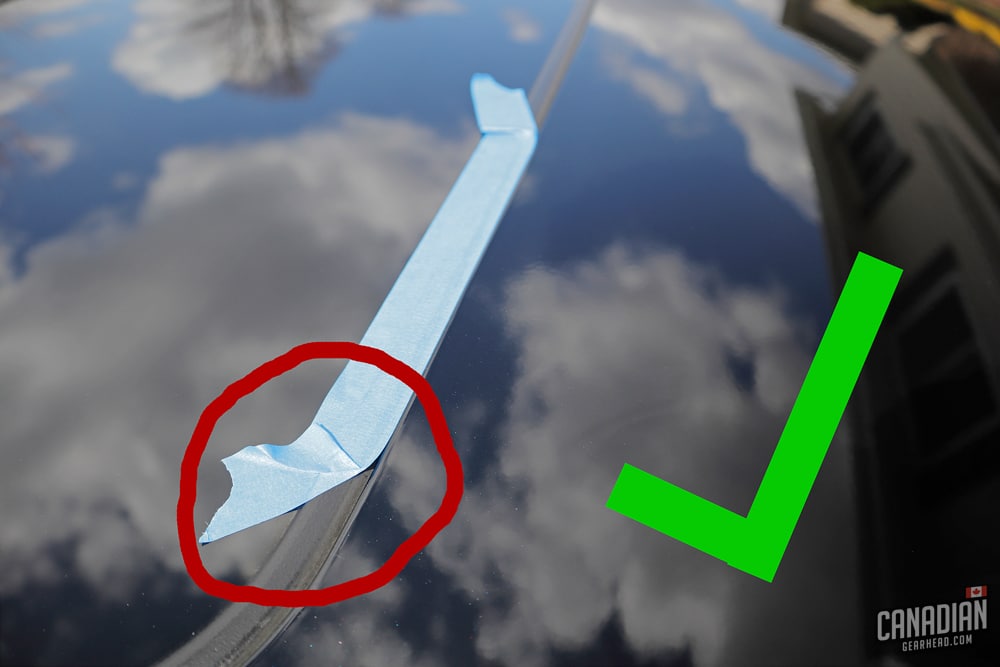
Turn the edges of your tape in to avoid catching your polishing pad
A common issue that you might run into is having your polishing pad grab the edge of your tape and peel it up. When this happens, you have to stop what you’re doing and re-tape the area. It’s not a major problem but it can be annoying when it keeps happening over and over.
The fix is easy – turn the edges of the tape inward on each end so the leading edge isn’t in the path of the polisher. The tape is much more likely to stay put when you do this.

Tim is the creator of Canadian Gearhead. His experience with auto detailing and working for Toyota shows through all of the articles posted here. He runs the Canadian Gearhead site and YouTube channel full-time now and currently owns a 2007 4runner, 2006 Tacoma, and 1991 MR2. Read more about Tim:
Leave a Reply