Long term ownership of a 4th Gen Toyota 4runner is very common due to their reliability and the fact that they do their job so well. The problem with owning one for many years is that certain things can become rather outdated. One of the biggest examples of this is the factory head unit and its lack of modern features.
What if you could upgrade your 4runner’s stereo to have the same features as a brand new one?
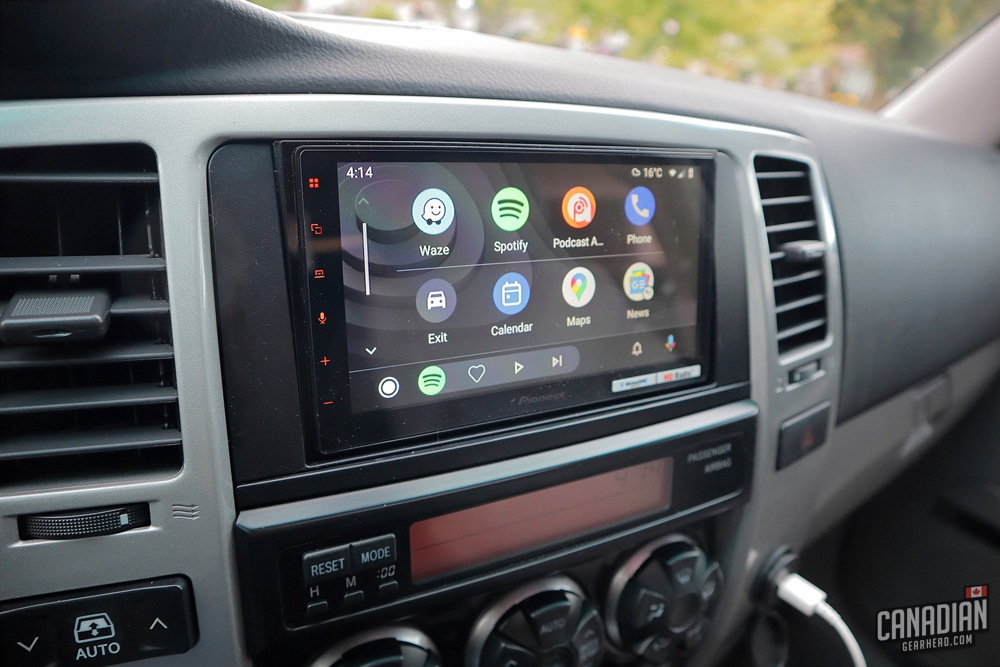
Upgrading the stereo to be able to use apps like Android Auto and Apple Carplay can be done by swapping out the OEM head unit with a modern aftermarket one. There are many head units that will give you access to Bluetooth calling, navigation, Spotify, and lots more.
The head unit is the only thing you need to replace to update the audio in your 4th gen 4runner. The rest of the system can be kept – you can even retain the optional JBL Synthesis system including the original amp, subwoofer, and steering wheel controls if you wish.
I’m no electronics wizard or car audio geek, but I was able to complete this entire install myself without any major problems. If you have some experience with working on cars and a little common sense, this can absolutely be a DIY job. If not, you might want to have a professional install it for you.
How to add Apple CarPlay and Android Auto to a 4th Gen Toyota 4runner
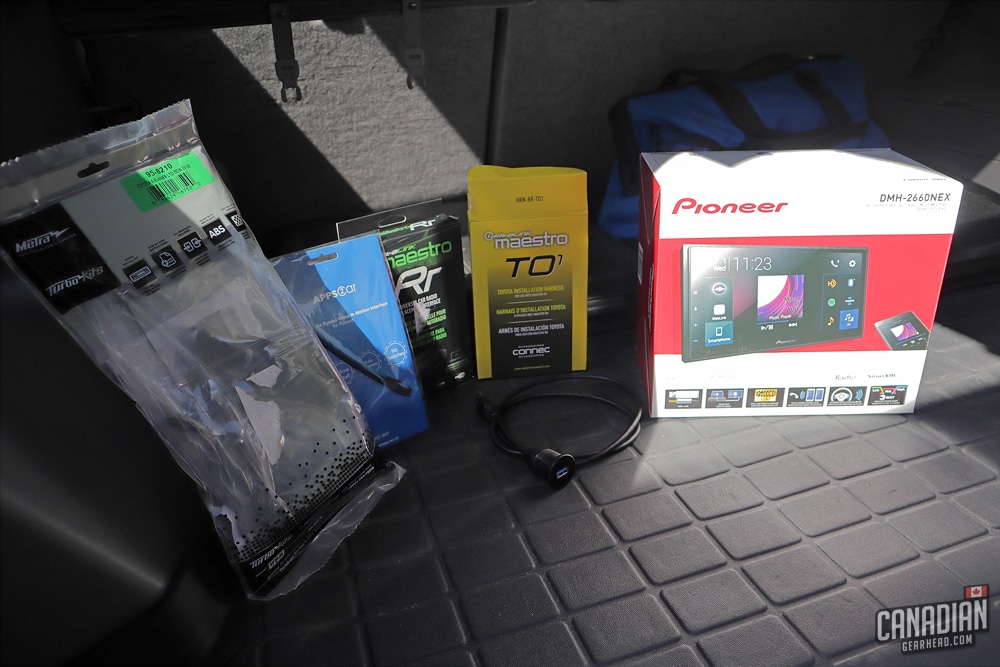
You’ll need a few parts in order to upgrade your 4runner’s stereo. I’ll list everything I used for my specific install but keep in mind that not all of these are required depending on your needs and whether or not you want to keep the JBL system and steering wheel controls. I wanted to do both, so this is a list of everything I needed:
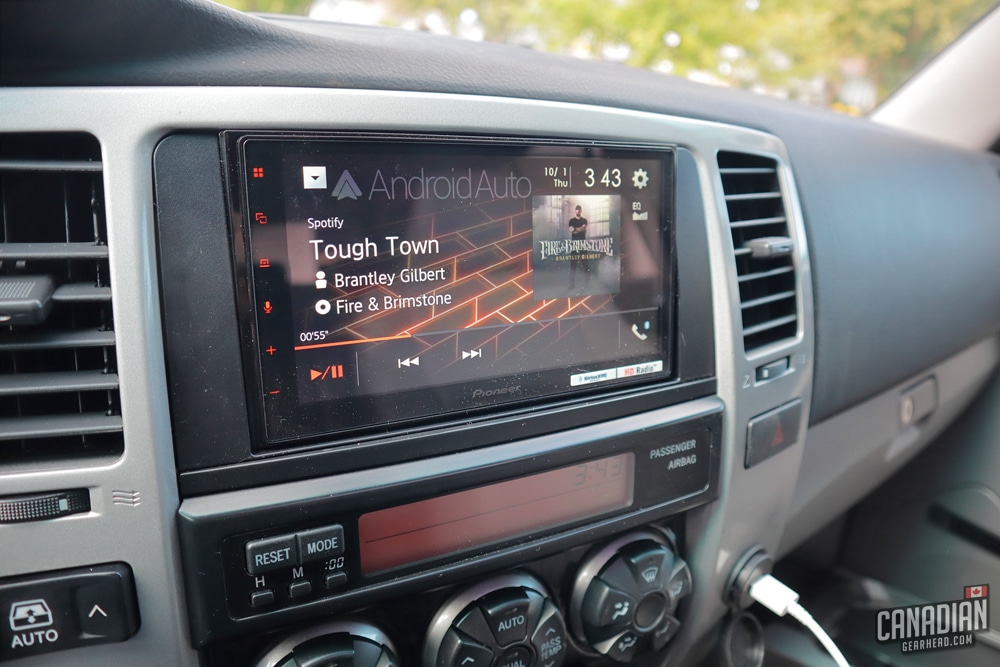
- Pioneer DMH-2660NEX Head Unit
- iDatalink Maestro RR Interface Module and iDatalink HRN-RR-T01 Factory Integration Adapter
- Metra 95-8210 Dash Kit
- Flush Mount USB Connection
- APPS2Car Parking Brake Bypass
I also used these connectors that Crutchfield recommended which made the minimal wiring required a breeze.
First, you’ll need to decide on a head unit. Double DIN touch screen models are the most common to upgrade to and the 4runner can fit them easily. There are lots of great aftermarket options available from companies like Pioneer, Kenwood, and Alpine. You’ll have to choose one that offers the features you want for a price you can afford.
I chose to go with this Pioneer DMH 2660NEX. It offers all the features needed to modernize the stereo in a 4th gen 4runner and then some. It’s also a pretty good bargain compared to its competitors.
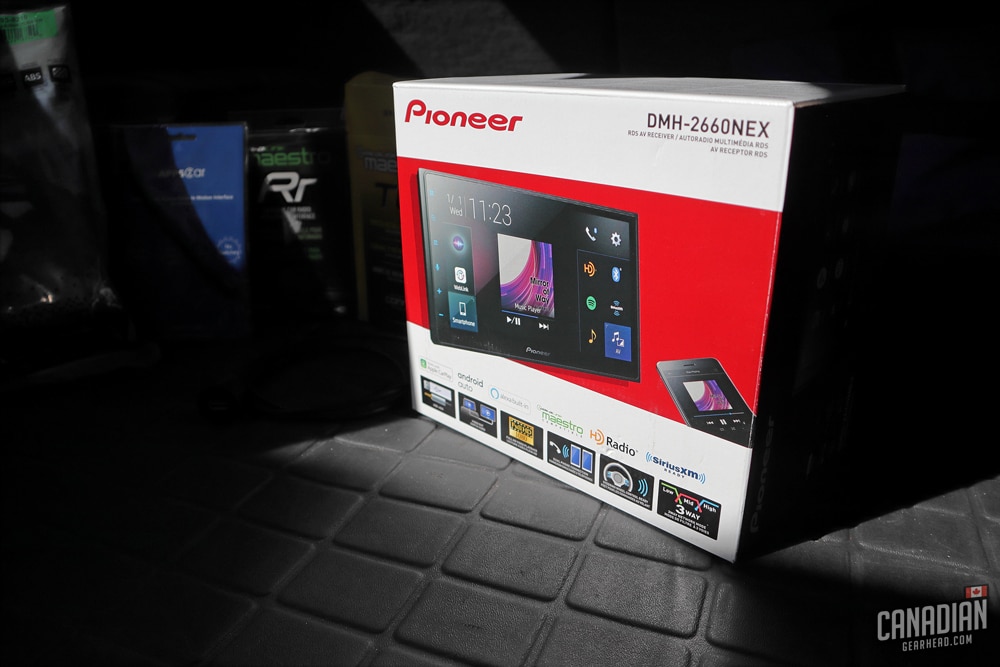
Main features of the Pioneer DMH-2660NEX:
- 6.8″ Touch screen
- Android Auto
- Apple CarPlay
- Amazon Alexa capability
- HD Radio
- Sirius XM Radio
- Bluetooth hands-free calling
- iDatalink Maestro capability
It also includes a Bluetooth microphone and a USB extension cable to connect your phone. This unit allows a backup camera but doesn’t include one – you’ll have to source your own.
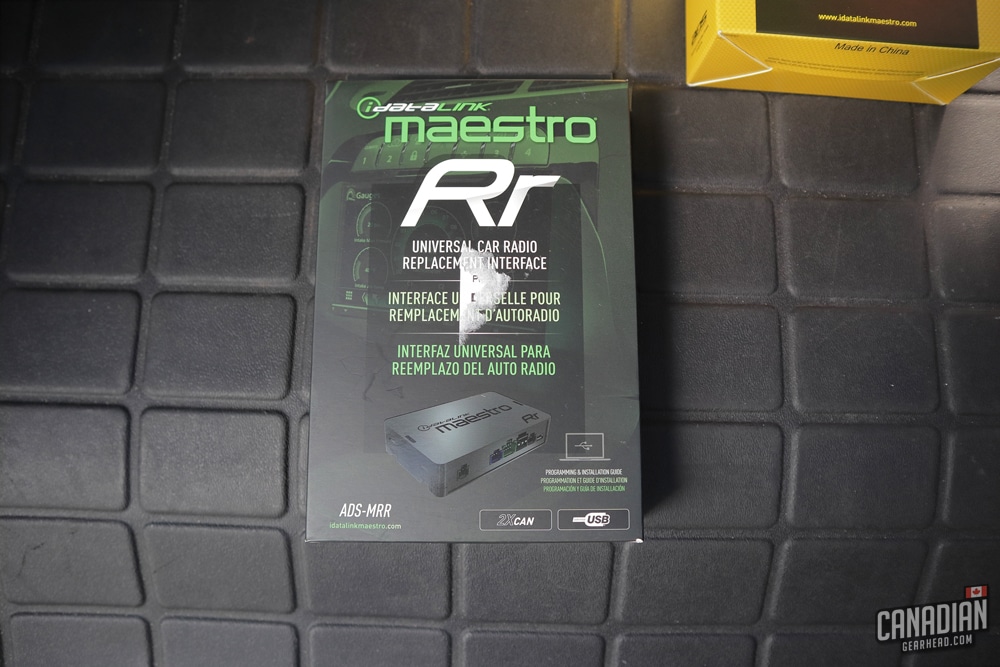

The iDatalink Maestro interface module offers you 3 benefits:
- The ability to maintain the use of the factory steering wheel controls
- Send data from the vehicle’s computer to enable certain gauges in your head unit
- Simple wiring when combined with the proper harness, making it easy to keep the factory JBL amplifier and speakers
Buying the matching Toyota adapter harness will give you all of the proper connections needed with only some minor wiring required.
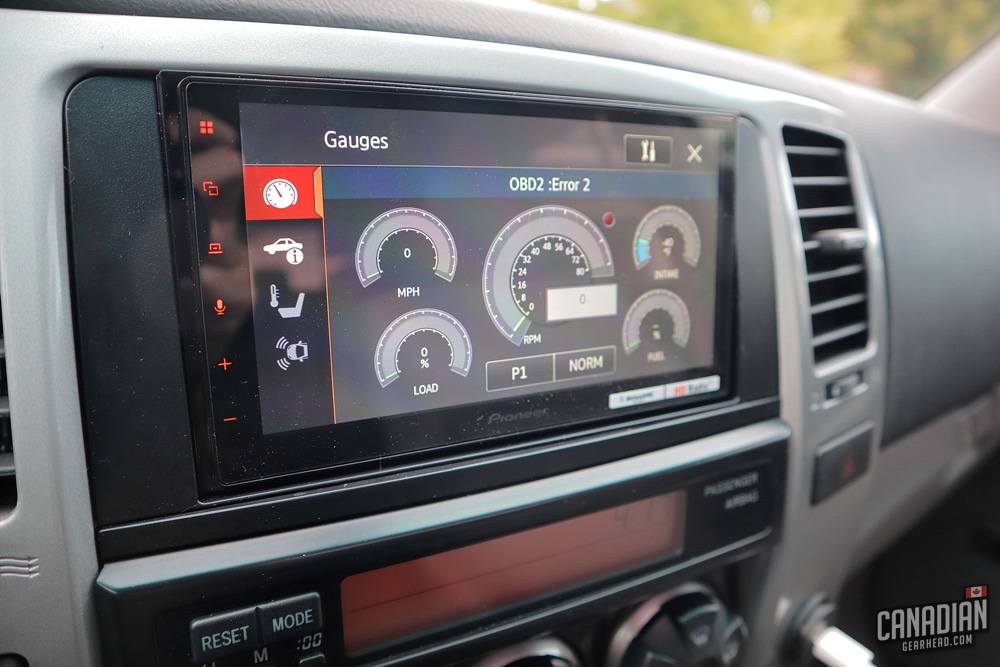
The Maestro RR plugs into your OBD2 port and will pick up some information from the Toyota ECU. This allows you to have a selection of gauges on your head unit that show things like tire pressure, water temp, engine load, and vehicle speed. From what I understand, this only works on 2005 and newer 4runners.
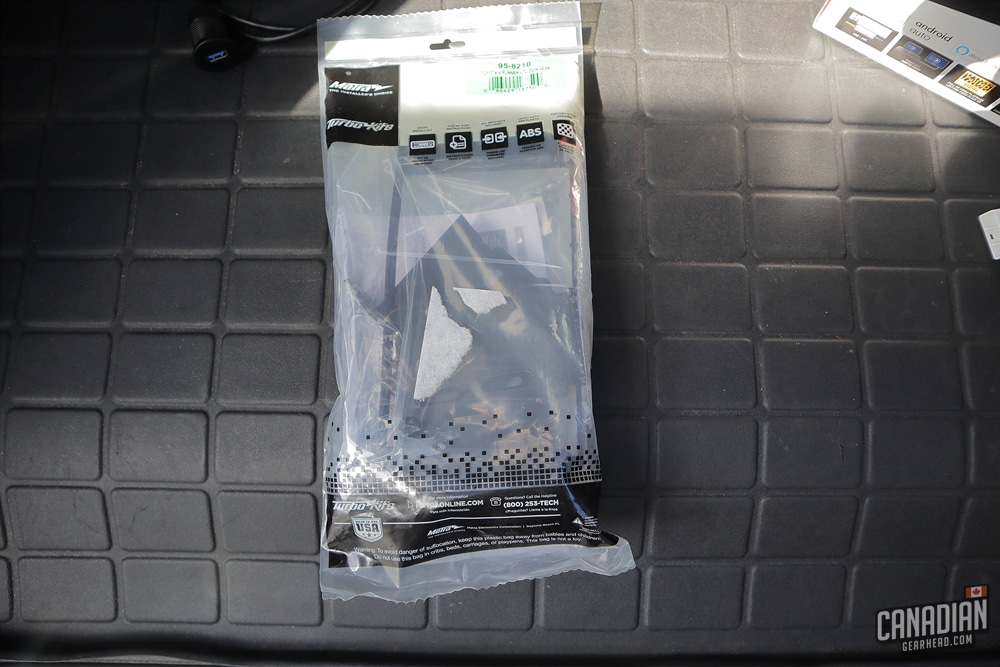
The 4th Gen 4runner’s dash has plenty of room to fit a double DIN head unit, but you’ll need a trim kit like this one from Metra to be able to mount it and get the spacing right.
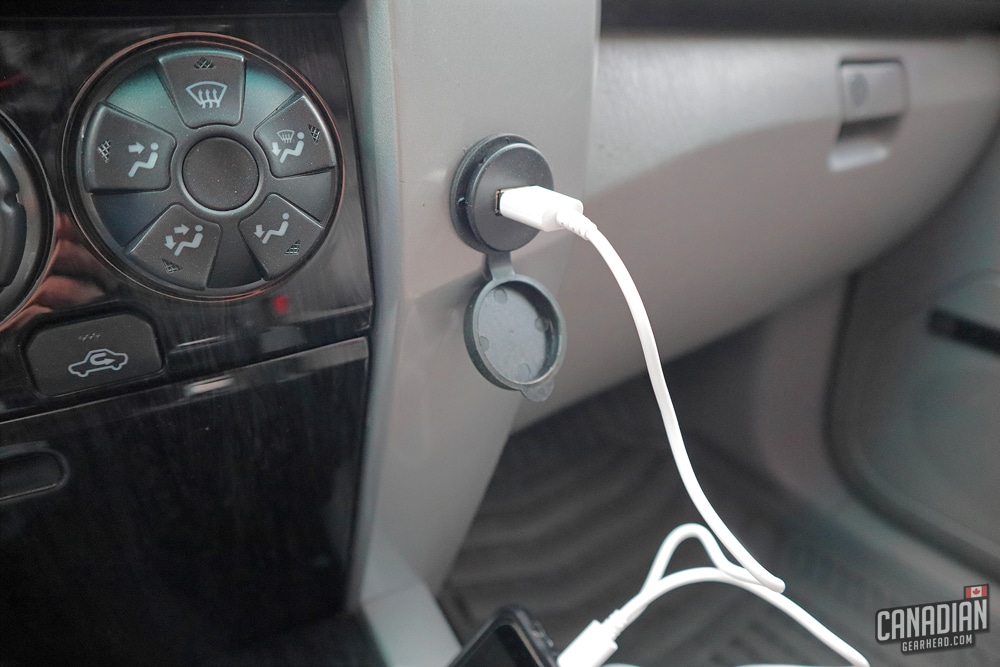
The flush-mounted USB port is completely optional here. I chose to add this just for the sake of a clean install rather than having a cable dangling around when there isn’t a phone connected. Pioneer includes a USB extension with their head unit so you can just use that and stash it in your glove box or center console.
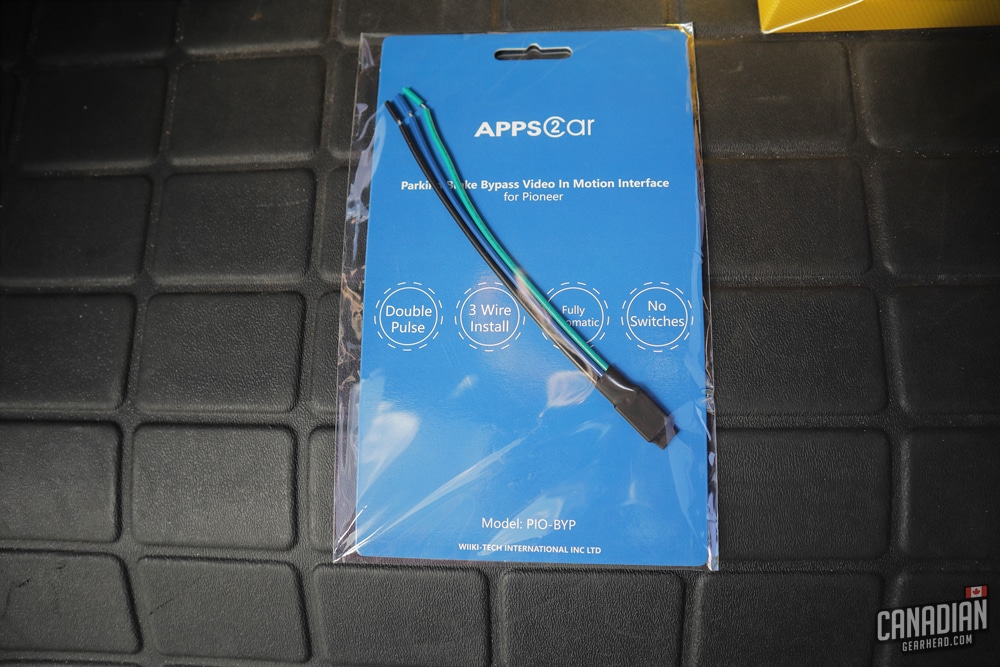
A parking brake bypass like the APPS2car is also optional but in my opinion, a good idea. It’s cheap and simple to wire in. Adding this allows you to change settings and access features in your Pioneer head unit that you’d normally have to have the parking brake on for.
I don’t use this to play video on the head unit so I’m not sure if it’s effective for that use. Some people online claim that the Pioneer unit picks up the vehicle speed and still refuses to play video even with the bypass. I haven’t tried it so I can’t confirm whether that’s true or not.
That’s all you need to upgrade the stereo in your 4th Gen 4runner. The install is simple as long as you stick with the right parts that I mentioned above. Using the proper harness for the Maestro RR eliminates the need for most of the wiring. You’ll still need to make a few connections but it’s very straight forward.
If you’d like to learn more about upgrading your audio system on a budget, check out this post:
Installing the Pioneer DMH-2660NEX
For most gearheads, this will be a simple DIY project that can be done in an afternoon. Crutchfield gives you a free installation guide if you purchase everything through them but it isn’t very difficult to figure out. I’ll explain the process here.
Preparation steps
Before you begin disassembly, there are a few things you’ll want to take care of. First, make sure you eject any CDs from your factory head unit. Once you disconnect it, they’ll be stuck in there.
The 2nd step is to turn the volume up on your factory head unit. I read about this online and I’m not sure if it’s necessary or not but it doesn’t hurt to do it. From what I understand, this has something to do with the amplifier.
I’ve seen some people complain that their aftermarket head units are much quieter than the factory one so I wonder if this has something to do with the loudness. Again, I can’t confirm this.
The last thing to do before you get started is to disconnect your battery. Some might tell you this isn’t necessary but it’s always better to be safe.
Tools needed
You won’t need much to be able to install a new head unit in your 4runner:
- 10mm socket (you’ll need an extension to reach 2 of the bolts on the head unit)
- Phillips screwdriver
- Wire strippers
- Panel pry tool (Although I didn’t need one – everything can be pulled out with your fingers)
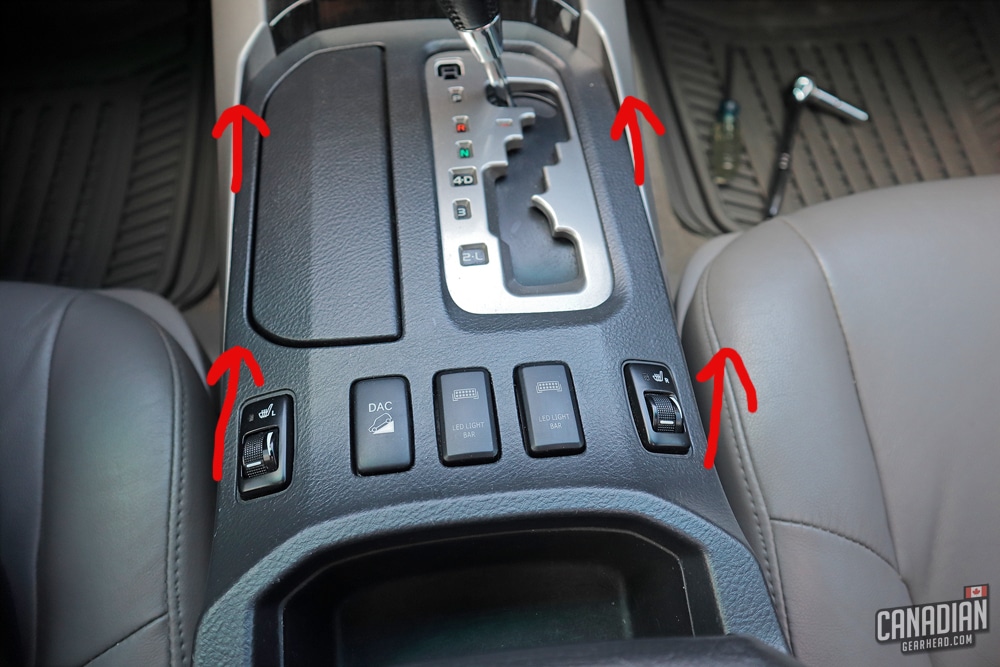
Remove the gear shift trim
Open the center console and pull the trim around the gear shift up. There are no bolts holding this in – just clips. Disconnect the wiring harnesses going to the switches (heated seats, DAC, rear air suspension). Remove the panel and place it out of the way.

Remove the storage cubby
The little storage compartment below the climate controls is next to go. All you need to do here is open it and pull upward. This just clips in but they might be a little stubborn. Take it easy, but you might need to give it a little force.
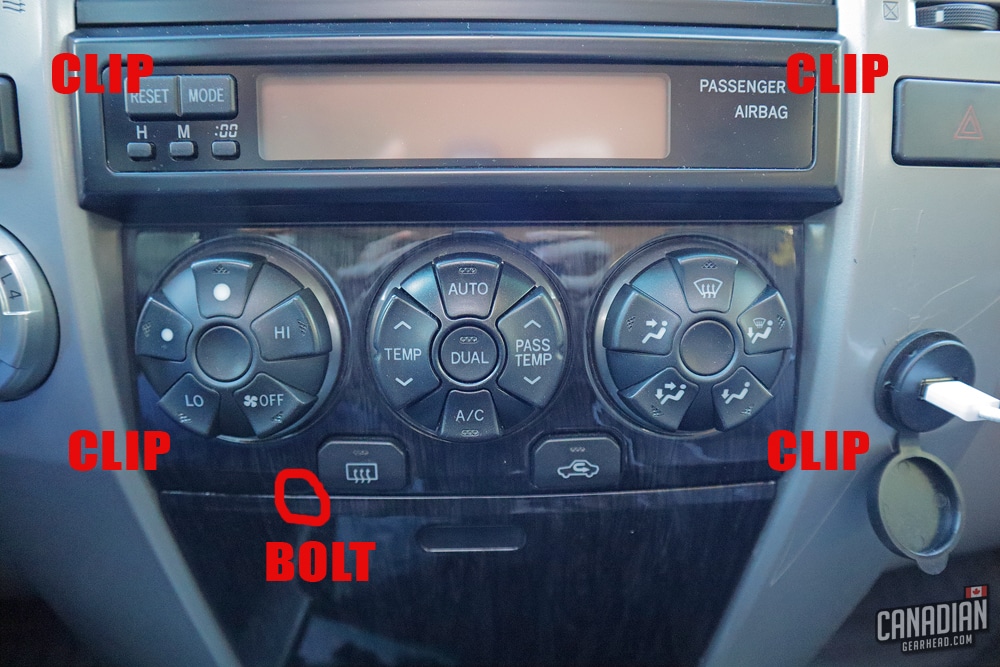
Remove the climate control panel
There is one single bolt holding this in that can be accessed now that the storage cubby is gone. Unscrew that and remove the panel. There is a bit of a trick to this – start at the bottom and pull it up and out to remove the lower clips. Then you can grab it from the top and pull it the rest of the way out. This might require some force but be careful.
Disconnect the harness going to the back and put the panel to the side. Make sure you don’t start the engine up with this disconnected though – apparently it’ll trigger an airbag light in the dash that only the dealership can turn off.
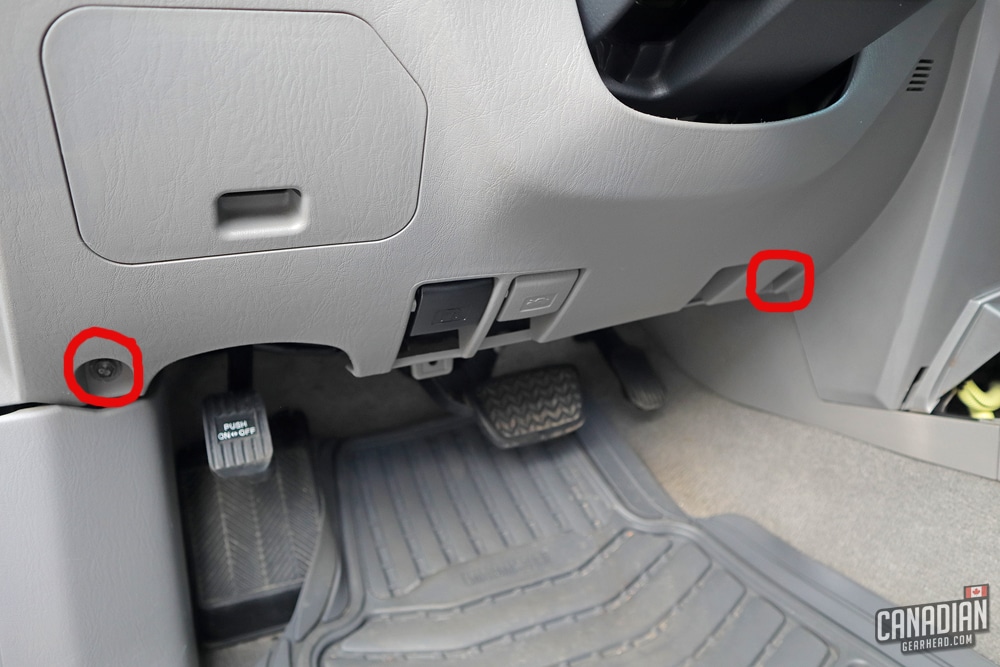
Remove the lower driver’s panel
There are a pair of 10mm bolts on the bottom of this panel. The top is held in with clips and comes out pretty easily. The trim ring around the ignition will likely fly off too – that’s okay, it snaps right back on.
This panel needs to be removed in order to get access to one 10mm bolt hidden behind it to remove the dash trim. It’s up to you if you want to disconnect everything and completely remove it or simply pull it down enough to access that bolt.

Remove the dash trim panel
The big gray dash trim panel needs to be removed next. Aside from the 10mm bolt that was hidden behind the lower panel, there are also 2 more of them right below the head unit. Once all 3 bolts are removed, you can begin carefully pulling the panel out from the clips. I found it easiest to start from the bottom and work my way up.
This shouldn’t put up too much of a fight – if it still feels solid, you might have missed a bolt somewhere. Once you get it free, disconnect the harnesses going to the rear window button, 4 way flasher button, and 4×4 switch.

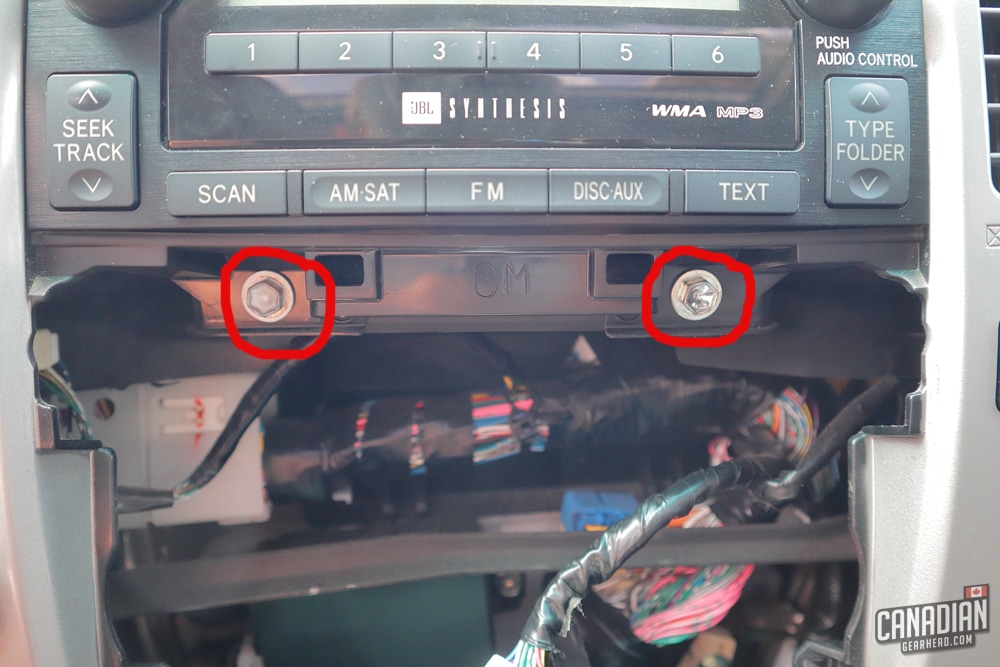
Remove the factory head unit
All that’s left now is to remove the 2 10mm bolts that hold the head unit in place. These are fairly deep so you’ll probably need to use an extension to reach them. Once they’re gone, you can pull the head unit out. Disconnect all of the plugs on the back and remove it from the dash.

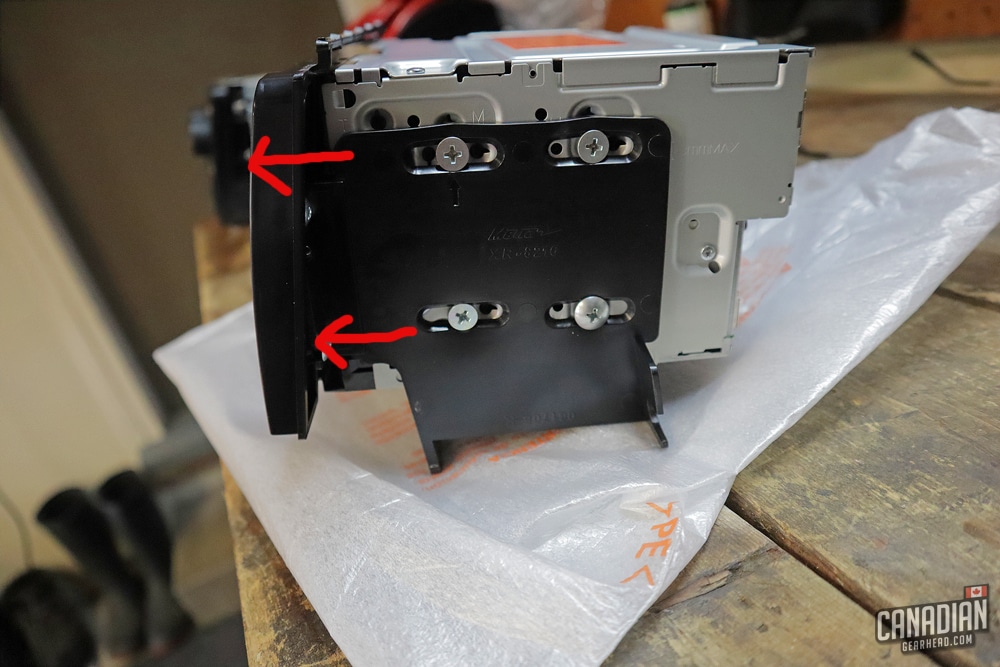
Mount the Metra kit to the new head unit
At this point, disassembly is done and it’s time to start getting things ready to be installed. The Metra dash kit comes in 3 pieces that need to be screwed together with the supplied screws. Next, mount it onto the new head unit. You won’t need to reuse any of the factory hardware – Pioneer includes new screws with the head unit.
I found out later on (after having to remove everything in order to get it to fit right) that the metra kit needs to be pushed as far forward as you can on the head unit. At least that’s what worked for me when I was having trouble getting all of the clips in place on the dash trim panel.
Get the wiring harness ready
If you’re anything like me, this is the step you’ve probably been dreading. Don’t worry though, it really isn’t that hard. Using the HRN-RR-T01 harness makes it much simpler by connecting straight to the factory harness. You’ll need to connect a few wires from that harness to the one that comes with the Pioneer head unit.
Install the Weblink plugin or desktop app
Go to idatalinkmaestro.com/plugin and download the plugin or desktop version of their software. This will allow you to flash your Maestro module.
Register an account on the Weblink website
You’ll need to start an account in order to access their wiring guide and flash your Maestro module. You can do this at idatalinkmaestro.com/register
Connect your Maestro module to your desktop or laptop
Plug your module in with the supplied USB cable. This is how you’ll be changing settings for the steering wheel controls.
Program the module and download the install guide
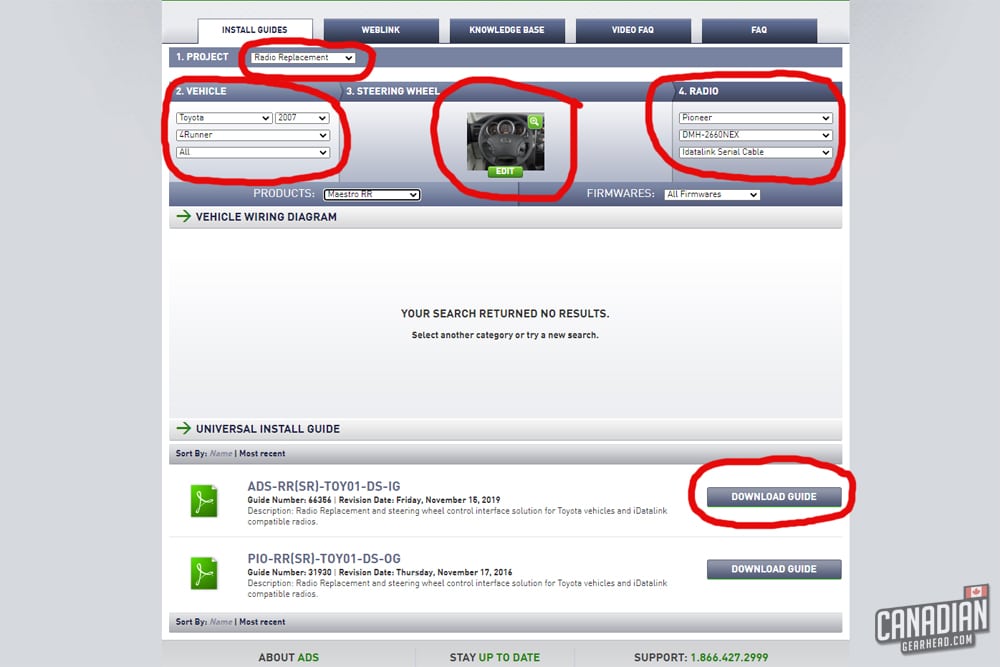
Once you’ve opened up the program you’ll be able to make changes to your module before flashing it. While you’re logged in, you can also download the iDatalink install guide for your specific setup.
It’s a little difficult to see, but find the drop-down box that says “Project” and choose “Radio Replacement“. Next, you’ll be able to input all of your vehicle information.
After that, you’ll need to tell it what buttons you have on your steering wheel (in this case, it’s just asking whether you have Bluetooth call buttons or not). Finally, input your radio information and select “iDatalink serial cable” from the final drop-down menu.
Download the “ADS-RR(SR)-TOY01-DS-IG” guide. Unfortunately, they have this set up as one huge document that includes the guide for every Toyota vehicle. Scroll roughly 10% of the way down until you find “2005-2011 Toyota 4runner with JBL“. They actually have a 5th Gen 4runner pictured incorrectly so pay close attention.
You can skip over the actual instructions – we only need the wiring diagram here. This basically tells you what is included in the harness when you snap it together and what wires you’ll need to connect yourself.
Wires that aren’t required with JBL Synthesis:
- White
- White/black
- Gray
- Gray/black
- Green
- Green/black
- Purple
- Purple/black
Wires that need to be connected:
| iDatalink Harness | Pioneer Harness |
|---|---|
| Blue/White | Blue/White |
| Black | Black |
| Red | Red |
| Yellow | Yellow |
| Orange | Orange/White |
| Purple/White | Purple/White |
| Light Green | Light Green |
Both the pink and yellow/black wires for the parking brake and vehicle speed weren’t on my Pioneer harness so I skipped both.
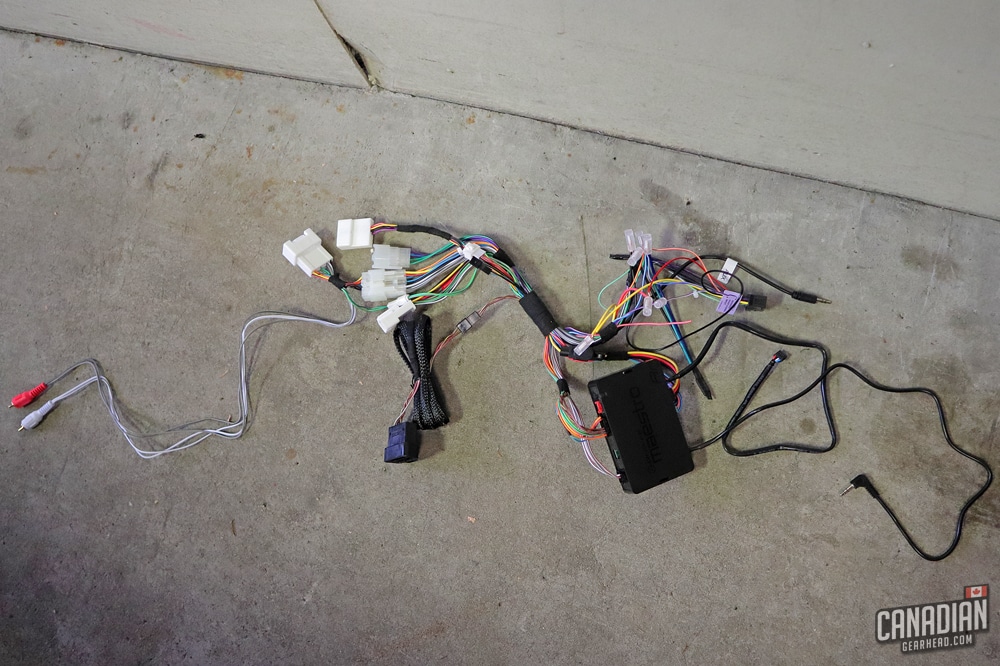
Next, bring the harness into the vehicle and find the connections that fit the factory plugs. These will only fit one way so you don’t have to worry about connecting the wrong ones.
Plug the Maestro module into the harness and connect the data cable and the aux cable to the other side of it. Don’t forget the OBD2 harness that connects the vehicle to the module as well.
Now you should have all the connections you need for the back of the Pioneer unit including the factory radio antenna, USB extension, white and red RCA cables, microphone, and the Pioneer harness.
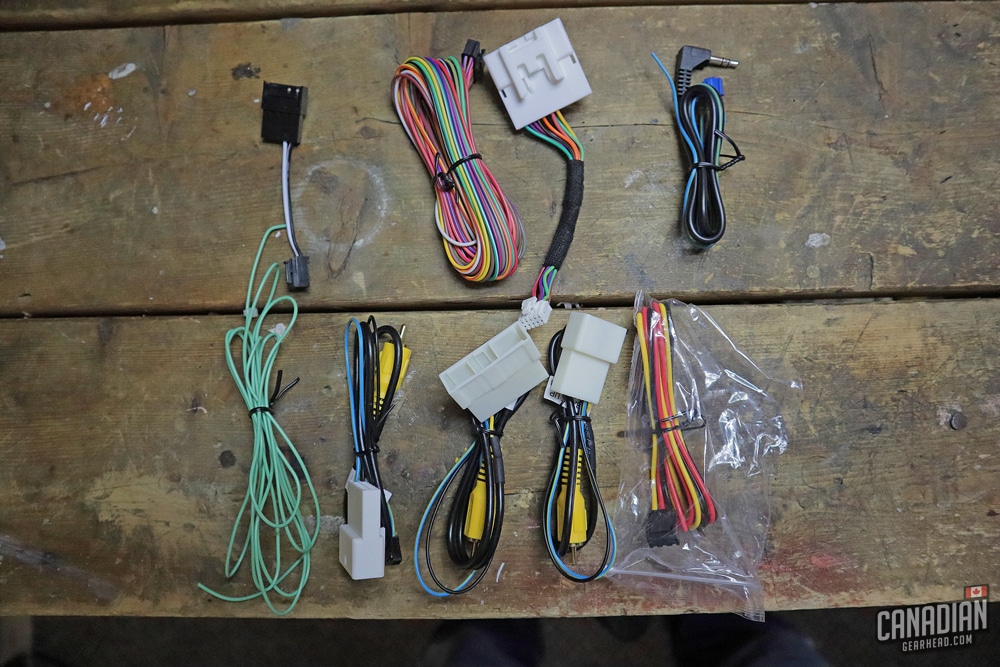
These are the harnesses that were included with the Maestro RR that I didn’t use:
Route the Bluetooth mic and USB cables
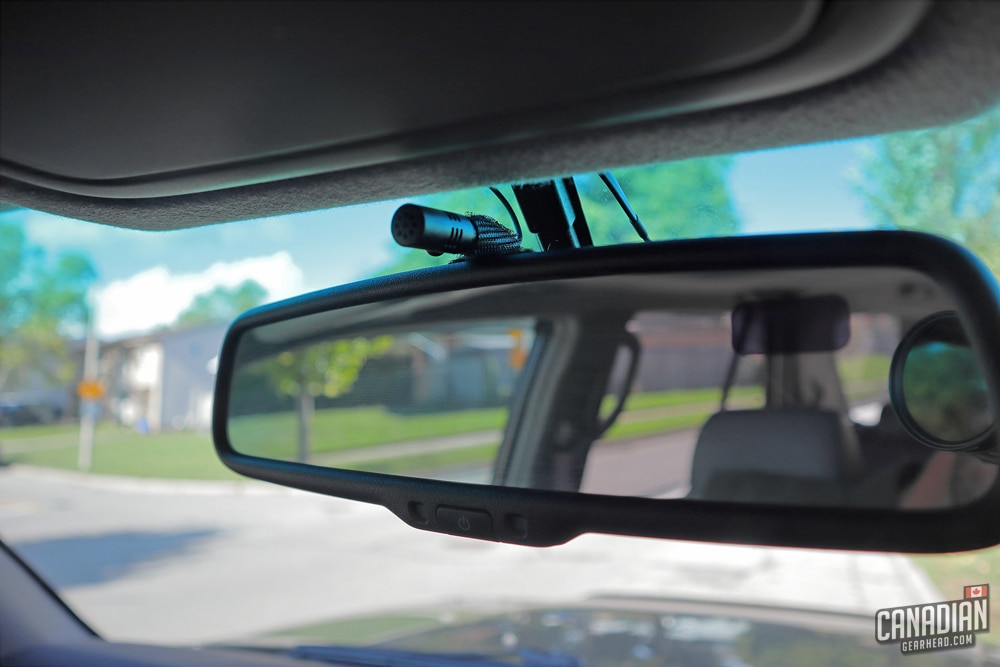
Now you’ll want to find a good place to mount your Bluetooth mic. Most people that I’ve seen put it at the top of the A-pillar panel. The supplied clip would work well here but I chose to run the wire across the top of the windshield and mounted the mic to the top of the rearview mirror.
There are 2 reasons why I chose this location for the mic. If you have a passenger and you both want to talk to whoever is on the phone, a central location makes more sense. Also, I can only assume you’d get some wind noise if you mount it on the A-pillar and drive with your window down.
At this point, you’ll also want to run your USB cable wherever you want it. I chose to add a flush-mounted port on my dash trim by drilling a hole but you can stick with just the supplied cord if you want.

Install the head unit
The biggest problem I ran into throughout the entire install was having enough space for all the extra wiring behind the head unit. There isn’t a whole lot of room there to begin with and both the extended harnesses and Maestro module certainly don’t help. Here’s what I found worked best:
- Slide the Maestro module into the little pocket toward the bottom of the dash opening.
- Push as much of the wiring toward the pocket in the back of the dash first before making all of your connections to the head unit.
- Slide the Metra dash kit forward on the head unit
These were the 3 adjustments I made that allowed me to have all the clips and bolt holes in place. Even with that, it still took some fiddling to get it all put together. Just take your time and make whatever adjustments you need to in order to make everything fit.
This is a good time to test your head unit to make sure everything is functioning properly. Reconnect the battery and don’t forget to plug in the connection on the back of the climate control before turning anything on (remember the risk of an airbag light!).
If everything works, you can button the rest up. If not, at least you won’t have to rip your dash apart again to investigate any possible mistakes.
Reassemble everything
The hard part is over. All that’s left to do is to reverse what you did in the disassembly steps. Don’t forget to plug in the connections for all of the buttons and the climate control panel!
If you haven’t already, you’ll need to download any apps on your phone for Android Auto or Apple CarPlay. Once you connect your phone for the first time, the head unit should walk you through any settings or setup that’s required.
As long as you’ve done your wiring correctly, everything should be working now including your steering wheel controls. I found that despite keeping all of the factory JBL speakers, amp, and subwoofer, the audio quality improved by quite a bit.
Combine that with the ability to stream music and use navigation and this is definitely one of my favorite mods I’ve done to the 4runner so far. The links at the top of this article will send you to all of the correct products needed for this install.

Tim is the creator of Canadian Gearhead. His experience with auto detailing and working for Toyota shows through all of the articles posted here. He runs the Canadian Gearhead site and YouTube channel full-time now and currently owns a 2007 4runner, 2006 Tacoma, and 1991 MR2. Read more about Tim:


Leave a Reply